Gamma 2.2 setup or linear workflow - [3] |
| |
Please don't translate or copy these tutorials elsewhere. I don't like the tutorials to float around in 10 different versions and places on the net. Feel free to link to this page of course! (see also Terms of Use) |
|
|
Before you start
If you discovered this Vray tutorial page through a direct link or search engine, please note that you're on page 3 of the tutorial! Please complete page 1 and2 first if you haven't done so. |
|
| Page 1 - Page 2 - Page 3 |
The vray frame buffer
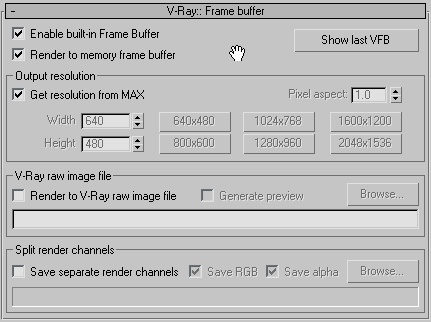
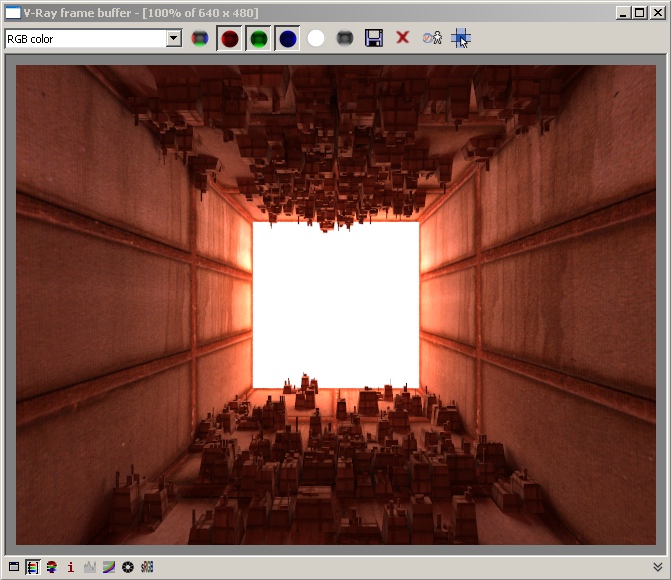
Until now, we always used the max VFB. However Vray has it's own VFB, which is in fact a lot better. To use it, go to the Vray frame buffer and enable it. Next we have to disable max's frame buffer: in the common parameters tab, turn of the 'rendered frame window'.
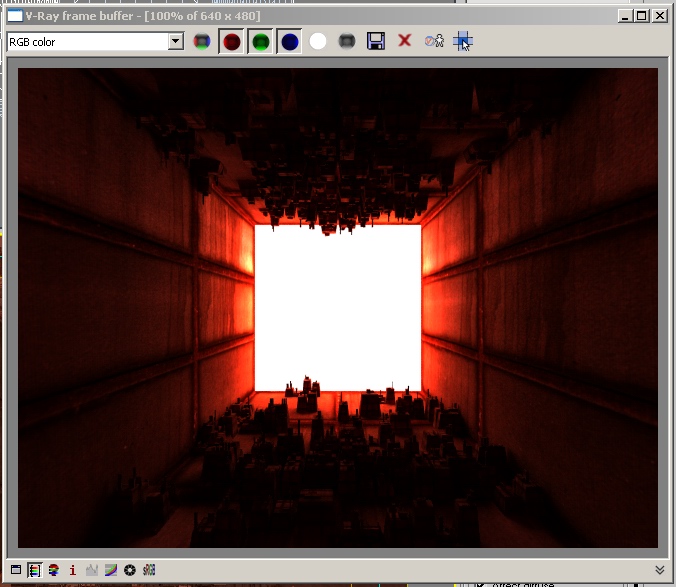
Now when I render again, the image in the Vray frame buffer looks also very dark, like the saved image when viewed in an image viewer outside max...
This is because the 3ds max gamma preferences DON'T affect the Vray VFB.
Luckily, the Vray VFB has it's own gamma correction. It's the small button labeled 'sRGB' on the bottom of the frame buffer.
When saving the image, you have to set the gamma to 2.2 again to burn it in, because the sRGB button is also only a display preview gamma correction.
|
Color mapping
Color mapping provides a final way of burning in the gamma 2.2 curve. First we disable the srgb button again (the image will be very dark again).
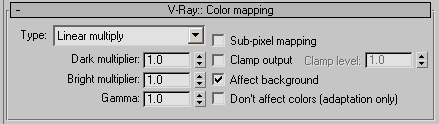
Now in the Vray tab, open the 'color mapping' rollout. You can leave everything as is, you only have to change the gamma to 2.2.
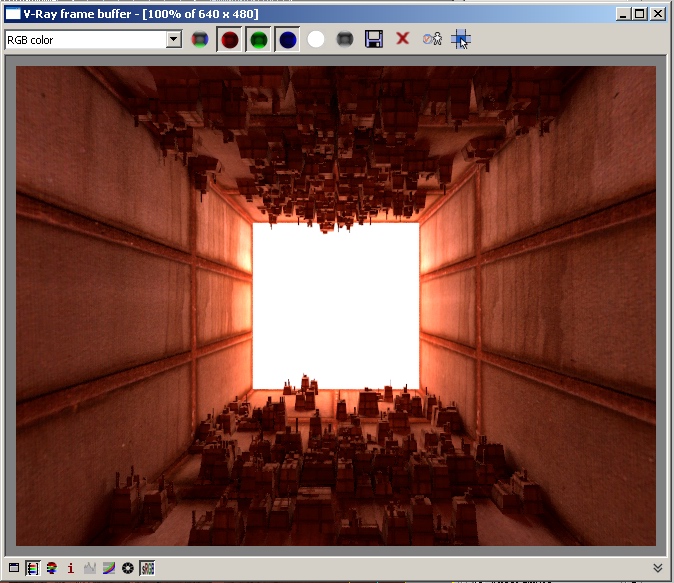
Render the image again, and you'll see that it looks good now, without having to press the srgb button.
The big difference of this technique is that it applies the gamma 2.2 curve while rendering. The previous methods were all done after the rendering has finished (or as a preview only). This difference is pretty important, as it has serious consequences on image quality!
|
Color mapping - quality
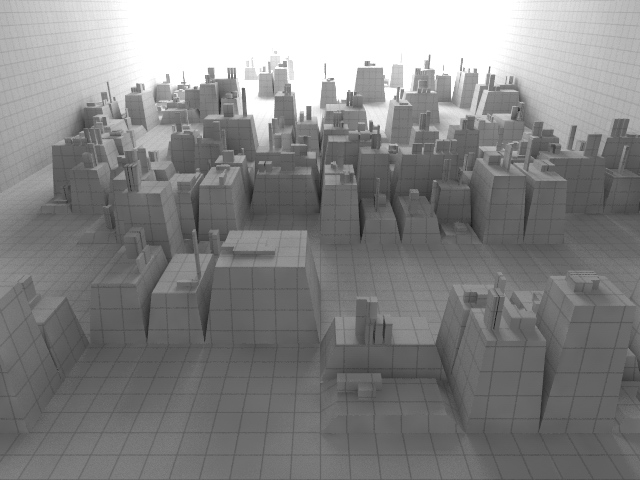
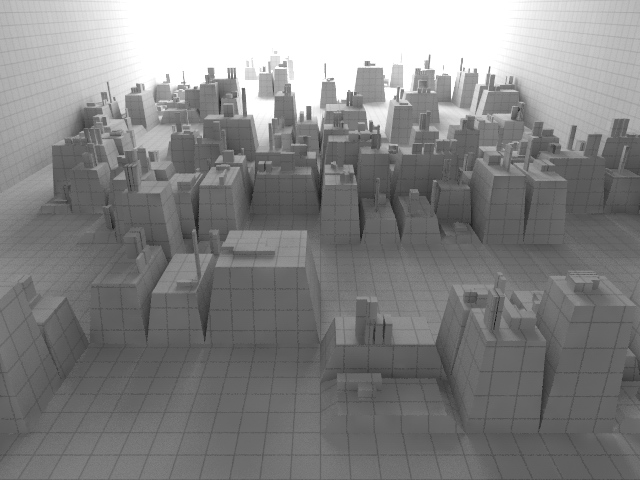
Here is an example of the difference in quality. Click the images to enlarge and view them side by side (or save them and view them one after the other in an image viewer). The first image is rendered with the color mapping technique, the second image without it, and is gamma corrected in post.
Take a close look at the building sides facing towards you (those who are not directly lit by the outside light). You will see that the lines running on these faces are noticeably more jagged in the second image than in the first.
This is because the vray sampler is sampling these lines on an image that is in fact pretty dark (the post gamma 2.2 correction made it brighter). With the color mapping technique, this image is already brighter during rendering so the sampler has less troubles identifying these lines.
Just remember that when you don't use the gamma 2.2 color mapping, you will need better sampling settings than when you do use it.
EDIT:
Since Vray 2.0, there is an extra option in color mapping: "don't affect colors (adaptation only)". When you do not want to burn in the gamma with color mapping, but you do want the sampler to use the gamma corrected image, you have to set gamma to 2.2, AND select this option. This will tell Vray to use a gamma 2.2 curve while sampling the image, but it will not display and burn in the gamma 2.2 correction into the image. (so you still use the srgb button to preview it correctly in the VFB). So this is only useful for people who don't want to burn in the gamma 2.2 curve into their images!!
|
Conclusion
This gamma 2.2 issue is crucial when trying to render photorealistic images. Without it, light falloff will in fact be wrong, and you will have to use all kinds of tricks to make your images look natural.
By simply enabling gamma 2.2 correction, you solve many issues in one go:
- light travels further into the scene
- Shadows look more natural
- Bounced light (GI) doesn't have the super strong color bleed
- Image quality in shadow regions improves without increasing render time
- HDRI lit images look correct
- Reflections will look more natural
|
Gamma 2.2 setup - summary: my workflow
Here is a short overview of my personal workflow and scene setup:
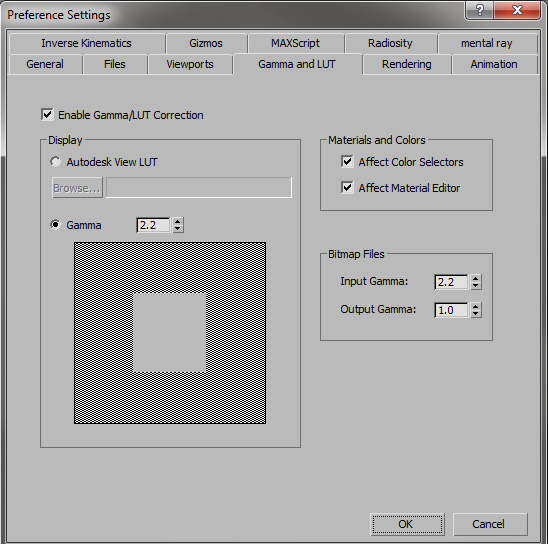
- In max preferences enable gamma/lut correction and set gamma to 2.2.
- Check affect color selectors and affect material editor.
- Set input gamma to 2.2 and output gamma to 1.0.
(so all imported textures are treated correctly automatically)
- In Vray color mapping, leave it set to linear, and set gamma to 2.2.
- Use the Vray VFB instead of the Max VFB.
In other words, I always bake the gamma 2.2 in the renderings through color mapping. I make sure however that the max interface is gamma corrected, to be able to choose colors correctly. I also make sure all my textures are recognized as gamma 2.2 corrected (input gamma setting = 2.2).
If you want to keep it simple, you don't have to do any more than these 5 steps! The output are normal images you can open in any post editor, you don't have to change gamma settings in these editors etc...
|
Gamma 2.2 setup: notes
- This workflow assumes you start from scratch with a new scene. If you take an old (non gamma 2.2 prepared) scene and simply render it with the gamma 2.2 setup, it will look washed out of course. Your materials and textures are not converted to work well with gamma 2.2, and your lighting is set up for your old workflow.
- I provide you with my workflow, if you like it, use it, if you don't like it, don't use it. Please don't email me trying to convince me it's no good :-)
- ALL my recent 3D projects are rendered with this setup.
|
|
| Page 1 - Page 2 - Page 3 |
| Back to Vray tutorials page |
|