Modeling a trackball mouse with Rhino 3D - tutorial p1 |
| |
Please don't translate or copy these tutorials elsewhere. I don't like the tutorials to float around in 10 different versions and places on the net. Feel free to link to this page of course! (see also Terms of Use) |
| Back to Rhinoceros tutorials page |
| |
| Page 1 - Page 2 - Page 3 - Page 4 - Page 5 |
| |
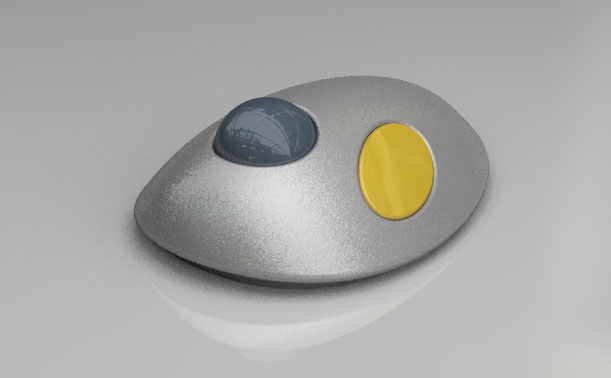
The rhinoceros level 2 training manual starts with an exercise to model this trackball mouse. With all the knowledge of the level 1 manual you should be able to create something like this easily.
These pages describe step by step one possible way to model the mouse. I will also use some functions of the level 2 manual (chapter 3 and 4) to optimize the modeling process.
Before you start, make sure you know basic stuff like grid snaps, object snaps, create layers, rename layers, mirror, scale 1D, scale 2D, copy, move, etc... |
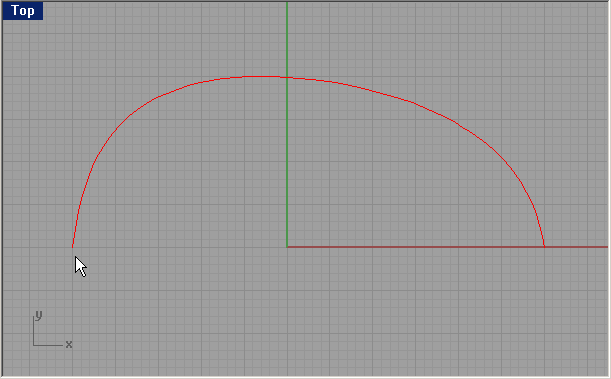
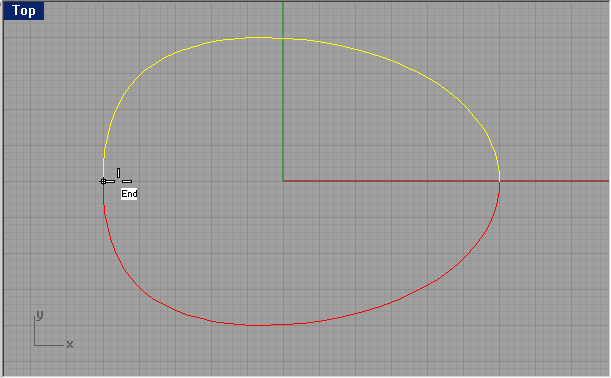
First of all, make a layer named 'curves', with a red color and make this the active layer.
Then draw a curve in top view, with roughly this shape. Use 'control point curve' or 'interpolated curve' tool to draw the curve. It doesn't matter if the curve isn't perfect from the first time, we will adjust it later on.
Make sure that you use grid snap for the start and end point so they both are on the same grid line, in this case the X axis. This is very important that you snap to the grid, if you go wrong here the whole model will be wrong!
Whenever you draw curves, use as few points as possible! You should be able to create this one with 7 points maximum. |
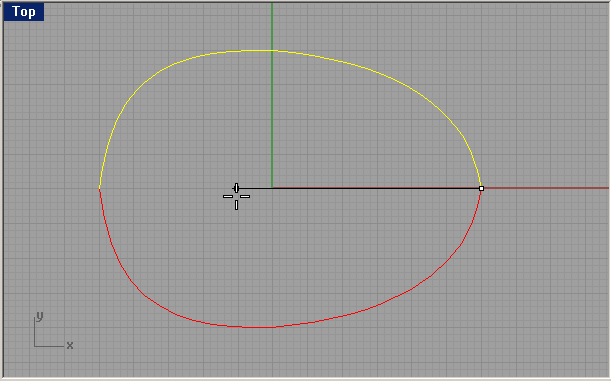
Mirror this curve in top view, using 'grid snap' or 'end snap' and 'ortho'. This is to make sure the two lines are symmetrical along the X-axis. |
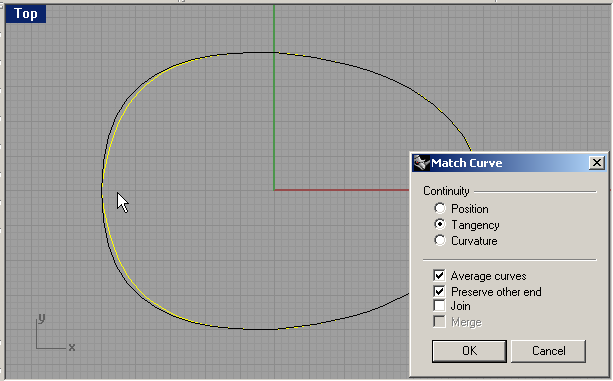
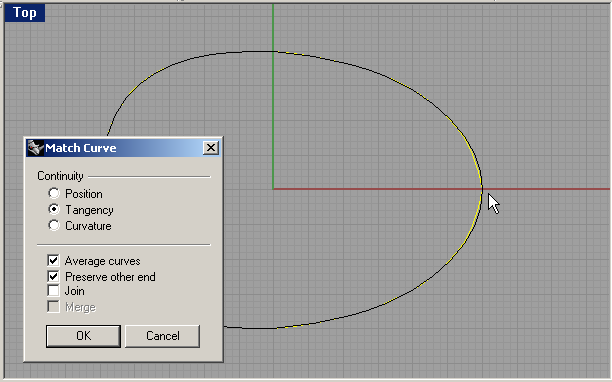
Choose "curve---curve edit tools---match curve" and match the 2 ends of the curve using tangency and average. It doesn't matter which curve you select first, since we choose average so both curves will change equally.
The tangent option makes sure our curves will not have a kink in them where they meet, it creates a smooth transition between the end points. This is an essential function which you should use a lot when drawing curves. |
Also match the other side. |
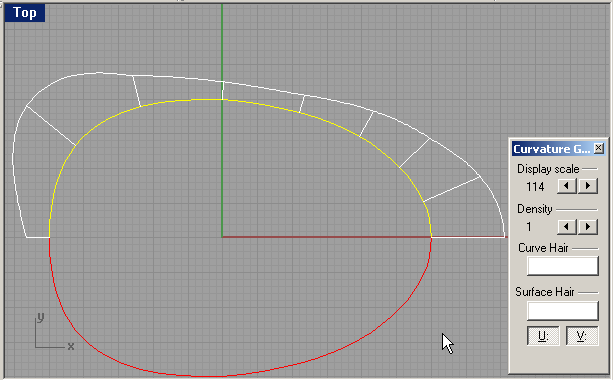
Select the top curve and go to "analyze-curve-curvature graph on". This will show a graph of the curvature of the curve. Probably you have to adjust the 'display scale' option to view the graph.
We will use this graph to make our curve very smooth. |
If for example the graph looks like this, it means the curvature is not very smooth. The curvature is the rate of change of the radius along the curve. If this changes to drastically, you will see a kink in the curvature graph, like in this image.
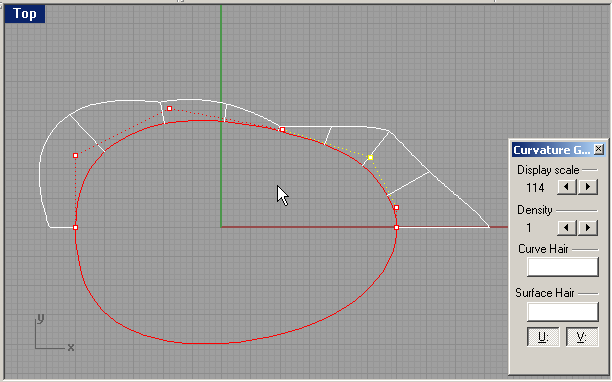
By moving some points, you will see the graph changing. It needs some practice to know how you must move your points in order to achieve a smooth graph. The goal is to move the points in such a way that you don't loose too much of your original shape of course.
Move the two points selected in the image only up and down with ortho snap. This will make sure the tangent transition remains intact and you don't need to rematch the curves. |
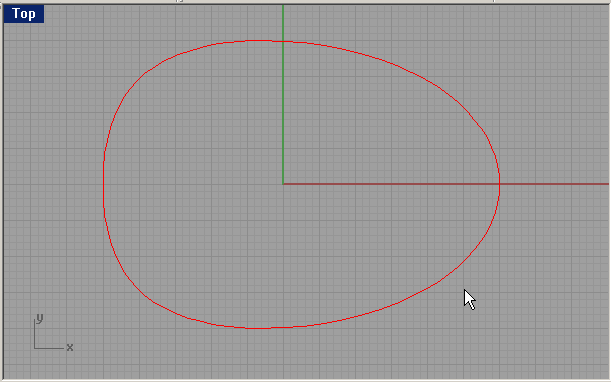
Now that you changed the top curve, delete the bottom and mirror the top so our shape will be symmetrical again. Because we moved the two 'second' points only up and down, we don't need to rematch the curves again because we can be sure they will still be tangent to each other. |
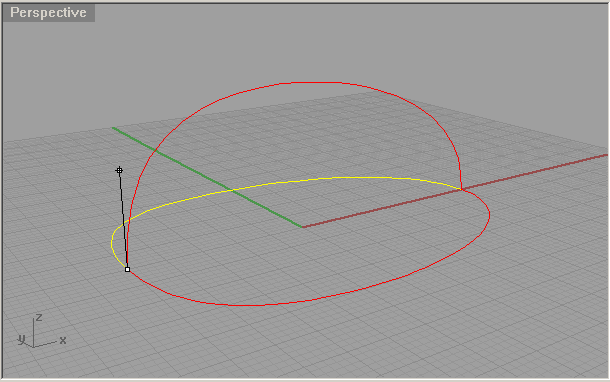
Now we have to create a side view profile curve for our mouse. We will do this by copy-rotating one of our top curves.
Select one half and choose "transform---rotate".
At the 'center of rotation' prompt, use end snap to snap to one of the end points. |
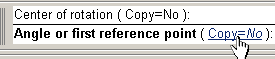
Meanwhile, make sure you set the rotate option to 'copy=yes' by clicking this option. This will make sure we copy-rotate the curve instead of just rotating it. |
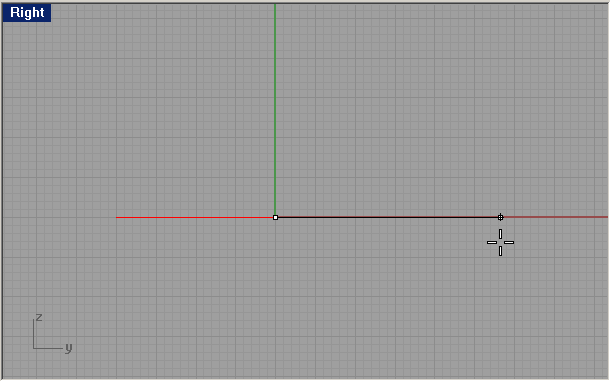
We have already defined our center of rotation, now we have to define our first reference point. Make sure 'planar' is active (the button between ortho and osnap).
Go to right view and with ortho on, select a point to the right of your center of rotation. |
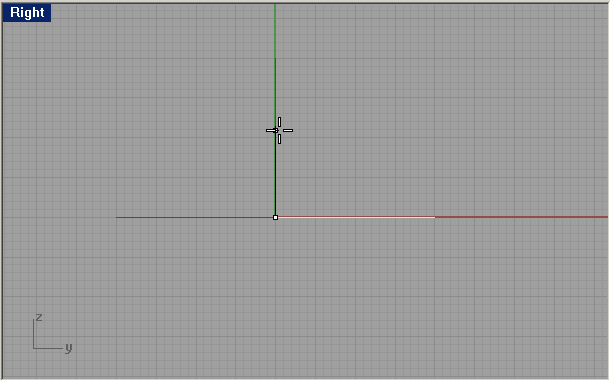
Still in right view, you can rotate the curve around the center point. By using ortho, our rotation will be limited to every 90°. So just move above your rotation point and click to complete the rotation |
This is what you should see in perspective view. |
|
| Page 1 - Page 2 - Page 3 - Page 4 - Page 5 |
| Back to Rhinoceros tutorials page |