FREE Vray Tutorial - Render glass and liquid [1] |
| |
Please don't translate or copy these tutorials elsewhere. I don't like the tutorials to float around in 10 different versions and places on the net. Feel free to link to this page of course! (see also Terms of Use) |
|
Before you start
This tutorial is all about rendering glass and liquid in V-ray. It's quite basic, but even for experienced users there might be some useful tips and tricks!
V-ray version 3.0 was used to create this tutorial. You will probably be able to follow along even with older versions, but some screenshots may vary, or some settings may changed place or will have a slightly different effect on image quality.
The included files are all 3D Studio Max 2013. These will open fine in newer max version, but you will not be able to open them in older ones!
You are allowed to use everything you find in the sample files for your own projects, but you are not allowed to use the textures, models or any part of the file to resell or redistribute.
First learn 3D Studio Max, then start with Vray. It is an extension to 3DS Max, not a replacement! For example things like the material editor, creating and manipulating objects, modifiers etc should all be familiar before trying to learn Vray. |
|
 |
|
| Page 1 - Page 2 - Page 3 |
Startup scene
Please download the startup 3DsMax file here: glass-liquid-startup.rar
Note that this is a 3DsMax2013 file, so you need at least that version to open it. Please don't email me for older versions...
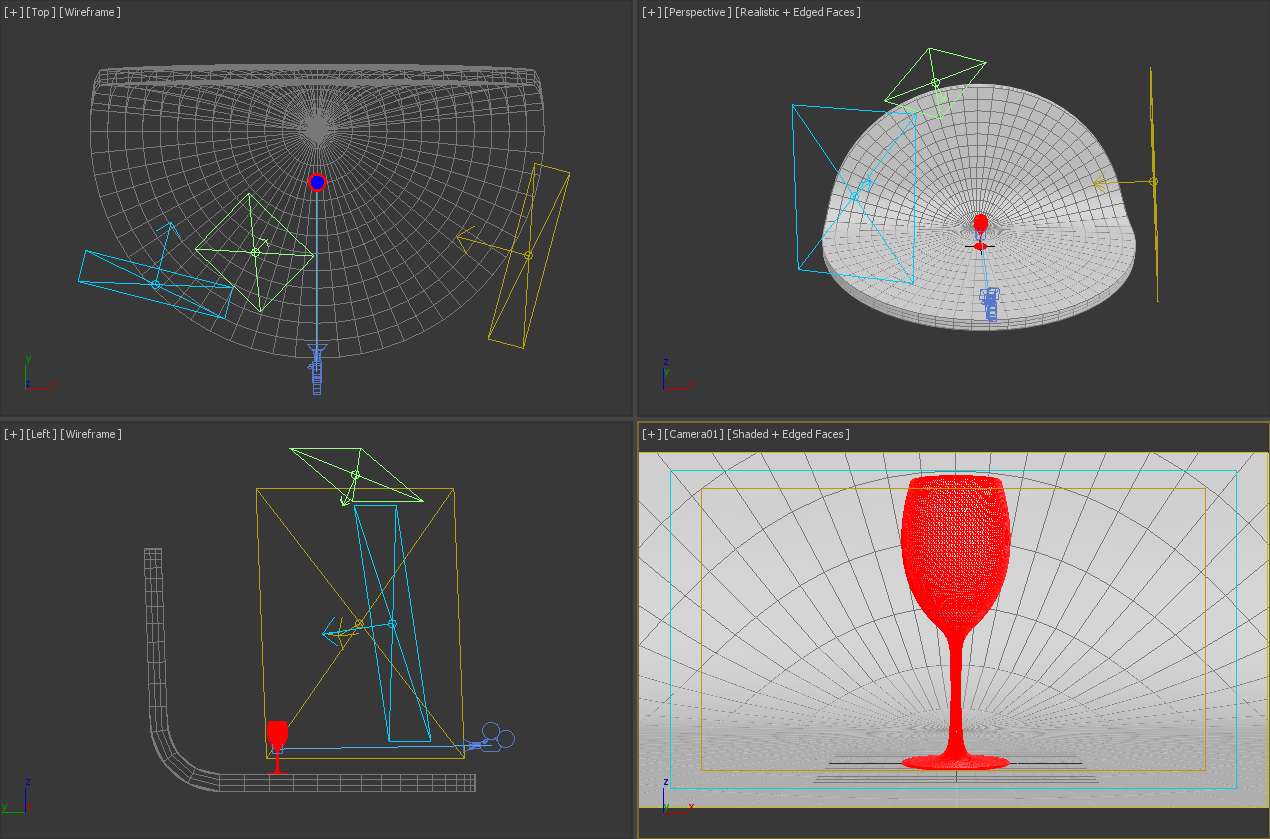
The scene features a typical studio setup:
- White photo-studio groundplane/background
- A few big rectangular lights
We also use the gamma 2.2 setup, please read that tutorial first if you don't know what I'm talking about. If you open the startup scene and accept all the warning dialogs, you should be fine.
GI is enabled, and there's a a black environment override color for reflection/refraction.
|
Wineglass
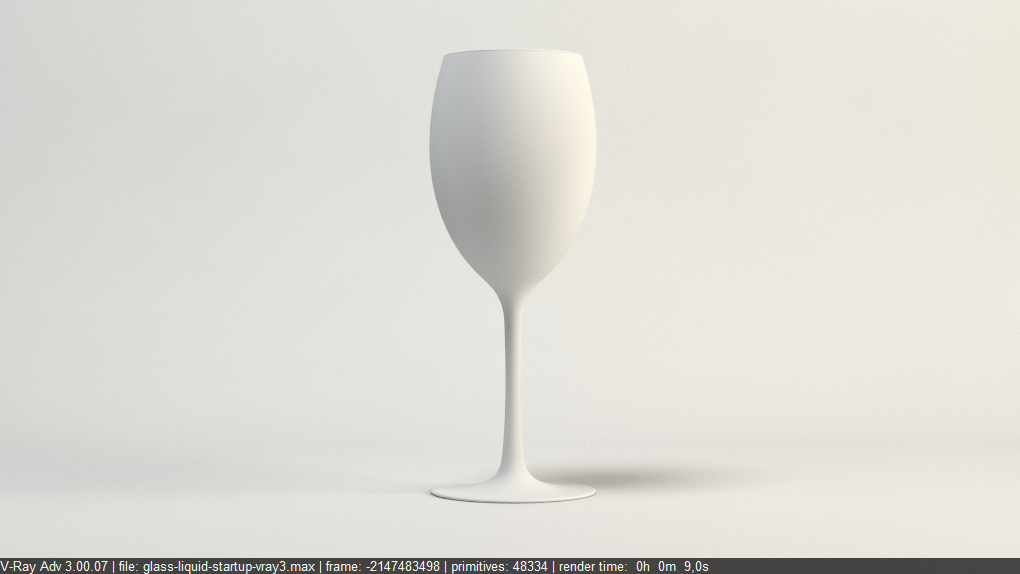
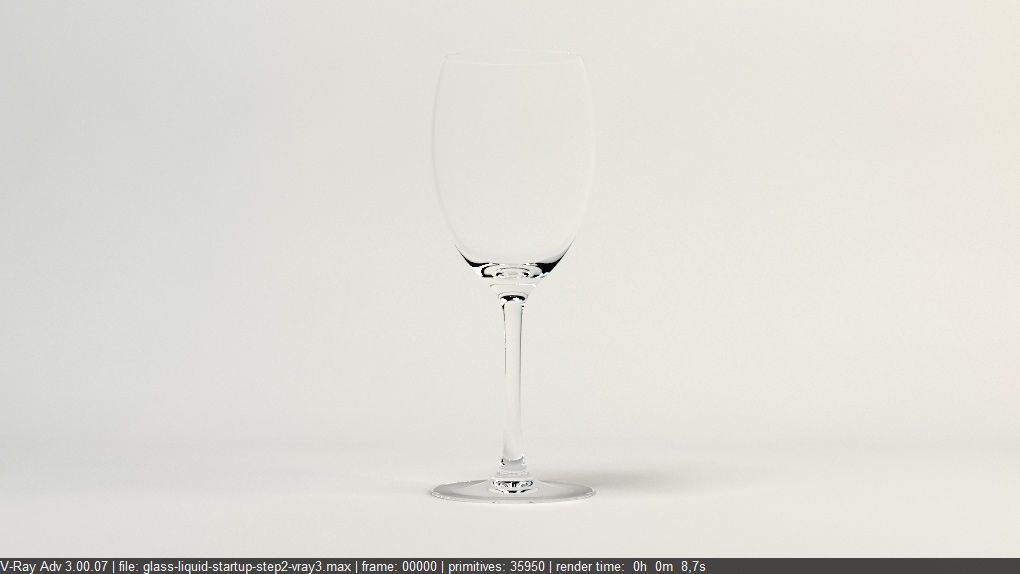
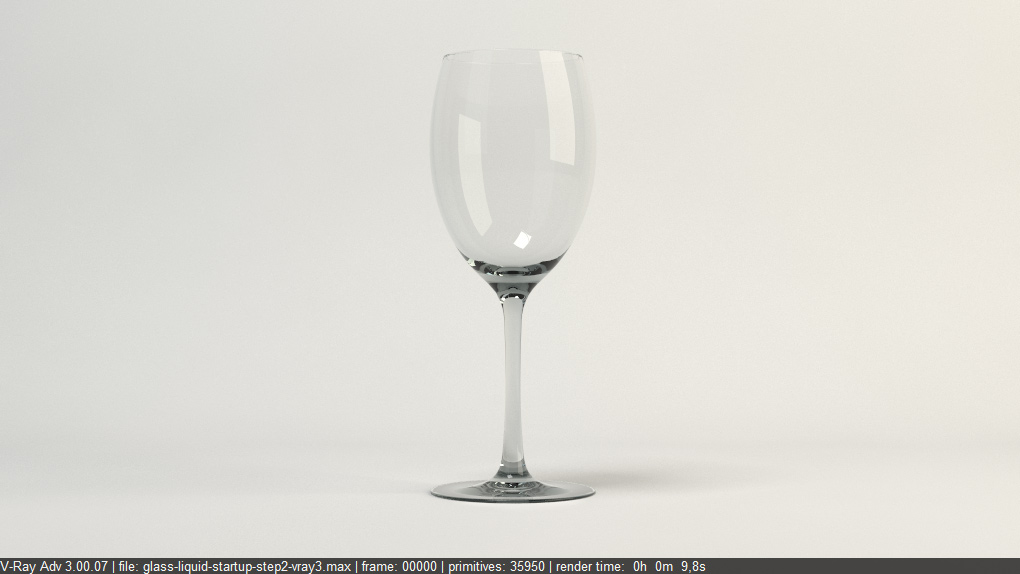
Currently both groundplane and wineglass have the same white, non reflective material. Hit render and you should get the image below.
As you can see, the main lighting is coming from the right and from the top. On the left there is a third light which is tinted slightly blue.
|
Glass material
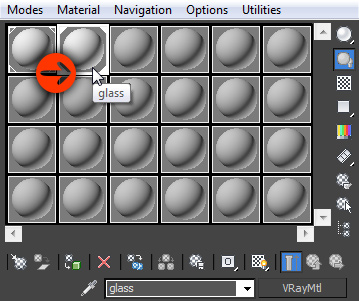
In the material editor, copy the floor material to a new slot, rename it 'glass' and apply it to the wineglass object.
|
Glass material - diffuse and refraction color
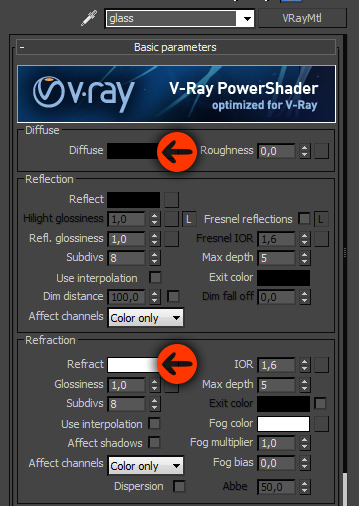
First we will change the diffuse color to pure black, and the refraction color to pure white. This is the best way to create any kind of glass material. Effectively you are disabling the diffuse color (pure black) and then by setting refraction to pure white you make is 100% transparent.
If you would like to know more about vray material creation, here's a basic V-ray material tutorial.
So with the newly created glass material applied to the wineglass, hit render to check out the result so far. It doesn't really look like glass, but it is indeed very transparent.
|
Glass material - reflections
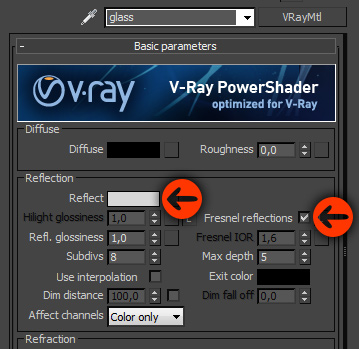
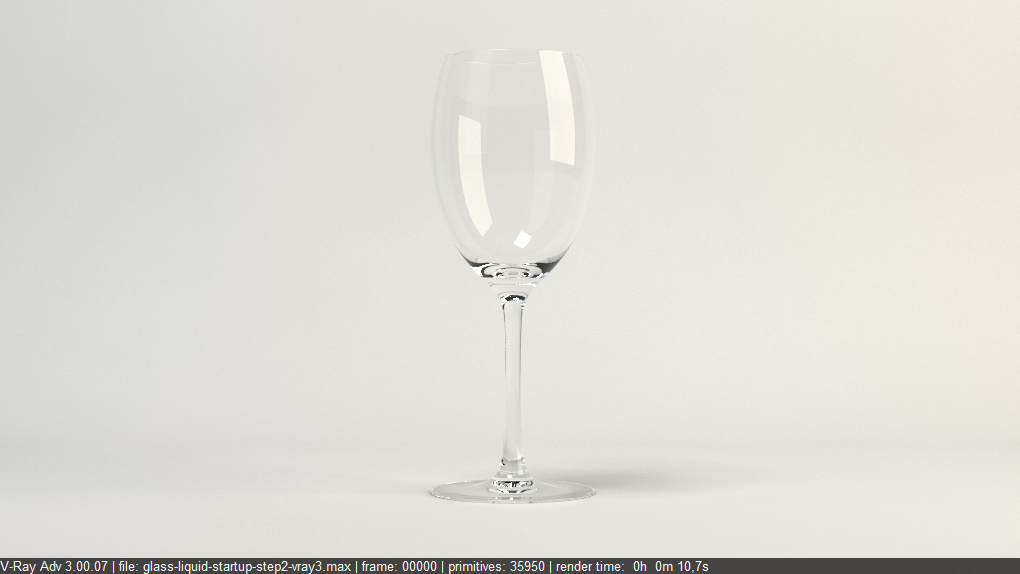
We also need to make the glass material reflective , so simply change the reflection color to a light grey, and make sure you have Fresnel reflections also checked.
Now when you render, it's starting to look more like real glass.
|
Glass IOR
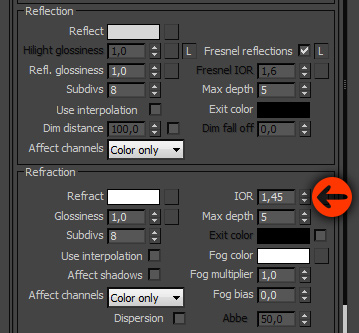
Change the IOR in refraction parameters to 1,45. Each material has a typical IOR value, and for glass 1,45 is a good starting point. This will also dim the reflections a little bit, since the reflection IOR is linked to the refraction IOR by default. The lower the IOR, the less refraction is going on, and the less reflective the object will become.
|
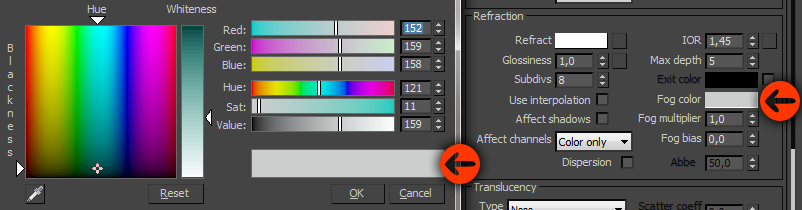
Glass color - Fog
Instead of using a tinted refraction color, we will be using the 'fog' parameter to color the glass.
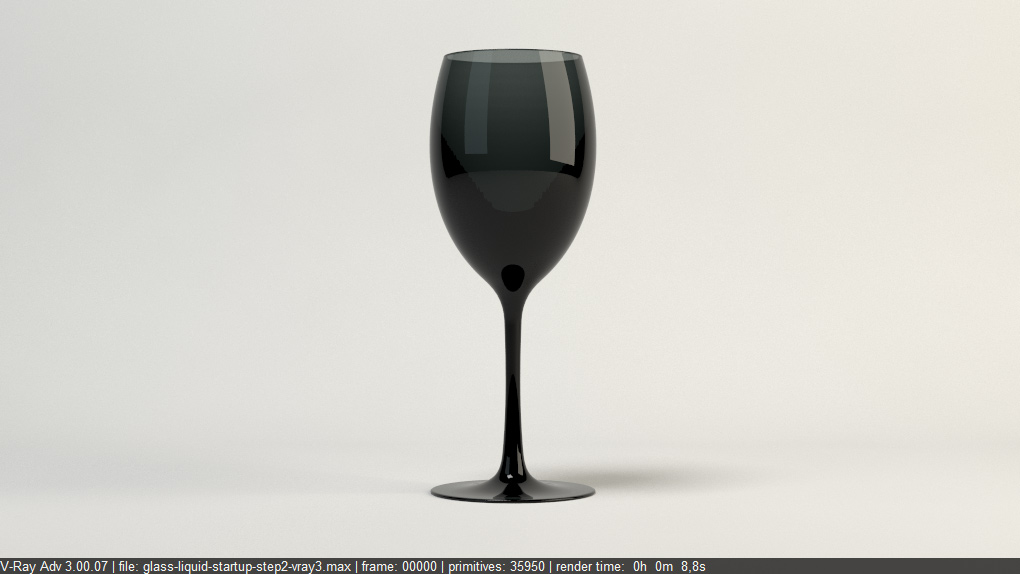
Change the white fog color to something like in the screenshot. I found that medium grey values work best, with a slight tint of the color you want in it. I chose a blueish tint, but don't overdo it since the goal here is to create normal transparent glass.
When you render, the result looks a bit strange. The glass suddenly becomes very dark.
|
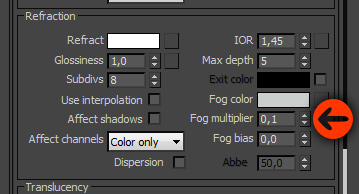
Glass color - fog multiplier
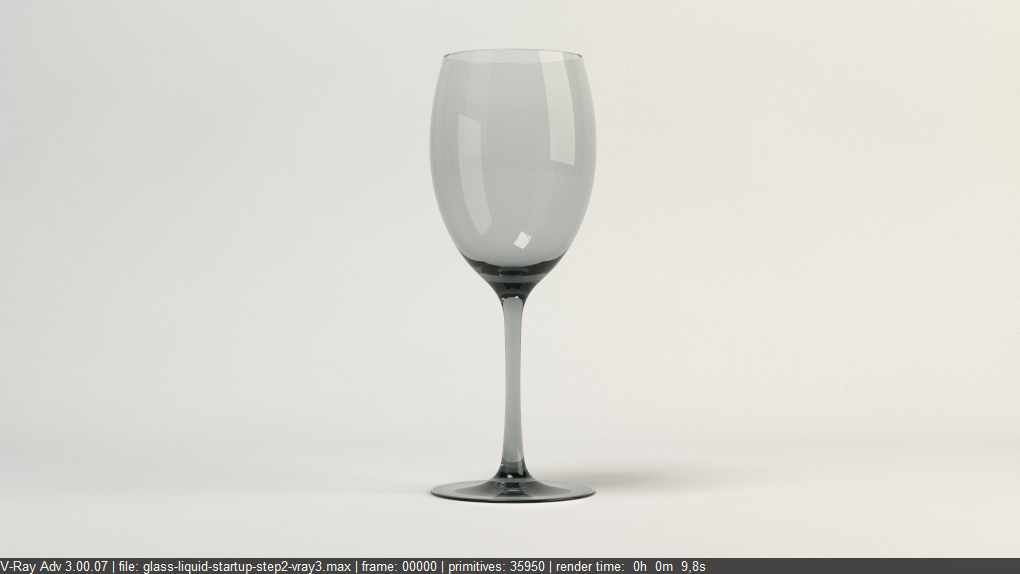
To change the effect of the fog color, lower the fog multiplier to 0,1 and render again.
As you see, the glass becomes more transparent, but the regions where a lot of refraction is going on, stay dark (thicker parts of the wineglass).
This looks a lot more like real glass, for example take a look at this picture. Of course, the look of the glass will depend heavily on the environment it is photographed in!
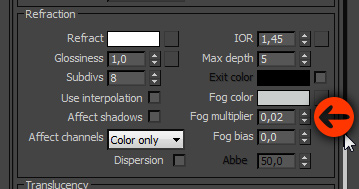
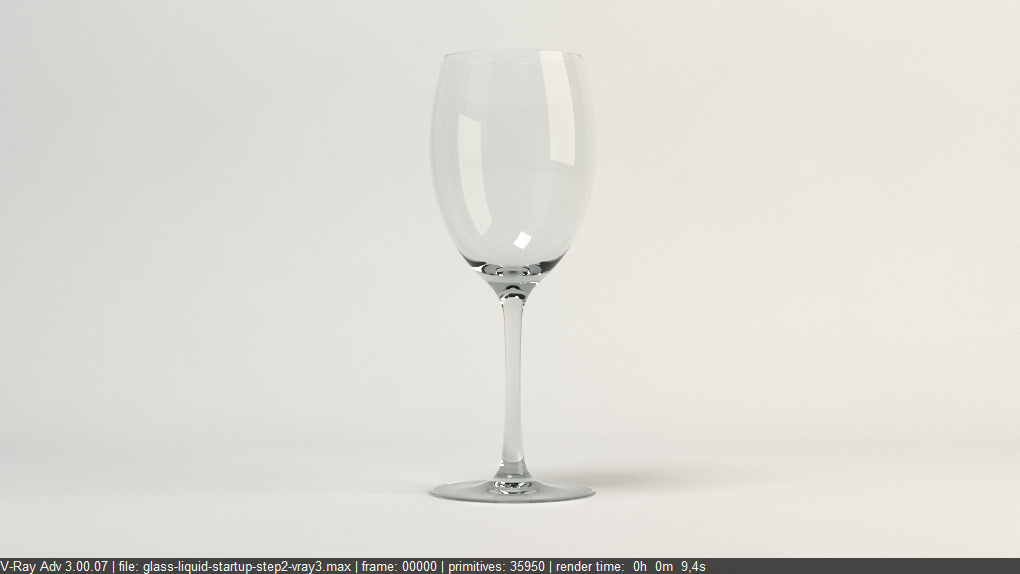
Reduce the multiplier even further to 0,02.
This will make the material even more transparent, as expected. The thinner parts look more real, but the thicker parts now also became a bit too transparant.
|
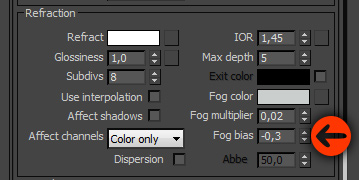
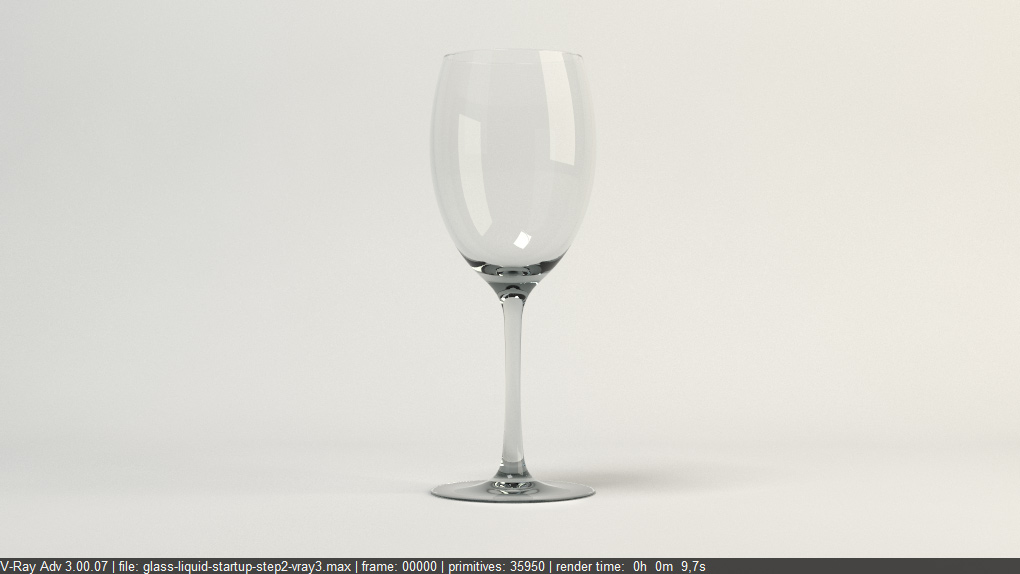
Glass color - fog bias
To get the best of both worlds, you can use the fog bias. Change it to -0,3 and do a test render. As you can see, the thinner parts look almost the same as before, while the thicker parts become a lot darker.
|
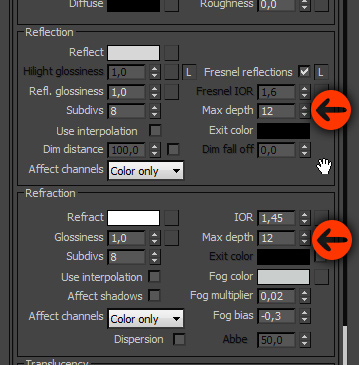
Max depth for reflection and refraction
Another thing we will be changing, is the max depth setting for both reflections and refractions. To speed up rendering, this is set to 5 by default.
So vray will by default stop tracing rays when they effectively passed 5 surfaces. For example in our scene, when you look through the upper part of the wineglass, you pass 4 surfaces (the glass has thickness, so there are 2 surfaces on each side of the glass).
It's the same for reflections, when a reflection is reflected, and that one is again reflected and so on, this can go on forever. It's like when you're in between 2 mirrors facing each other, your reflection will be reflected in infinity. Click here for an example.
So to speed up calculations, you can control the depth of reflections and refractions that will be calculated by Vray. Usually 5 is enough, but since we are rendering glass specifically, increase the depth to 12 for both reflections and refractions.
Note that the difference is subtle...
|
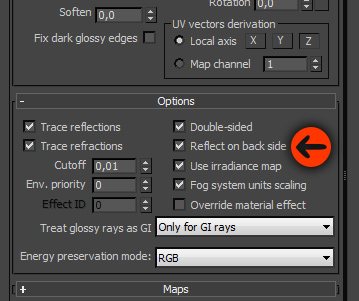
Reflect on backside
In the options rollout of the glass material, turn on the 'reflect on backside' option. You will see that now also the inside of the glass surfaces reflect the light sources (looks like double reflections in the upper part of the glass).
|
| Back to Vray tutorials page |
|
| Page 1 - Page 2 - Page 3 |
|
 |
|