FREE Vray Tutorial - Vray skylight to light a scene |
| |
Please don't translate or copy these tutorials elsewhere. I don't like the tutorials to float around in 10 different versions and places on the net. Feel free to link to this page of course! (see also Terms of Use) |
|
Before you start
This tutorial will explain the basics of the Vray skylight. It's a very easy way to globally light your scene.
This tutorial was created with Vray version 3.0, please do not email me with questions about this tutorial if you are using a Vray version prior to V-ray 3.0, since the answer to your question is most likely that you're using a older version.
First learn 3D Studio Max, then start with Vray. It is an extension to 3DS Max, not a replacement! For example things like the material editor, creating and manipulating objects, modifiers etc should all be familiar before trying to learn Vray. |
|
 |
Startup settings
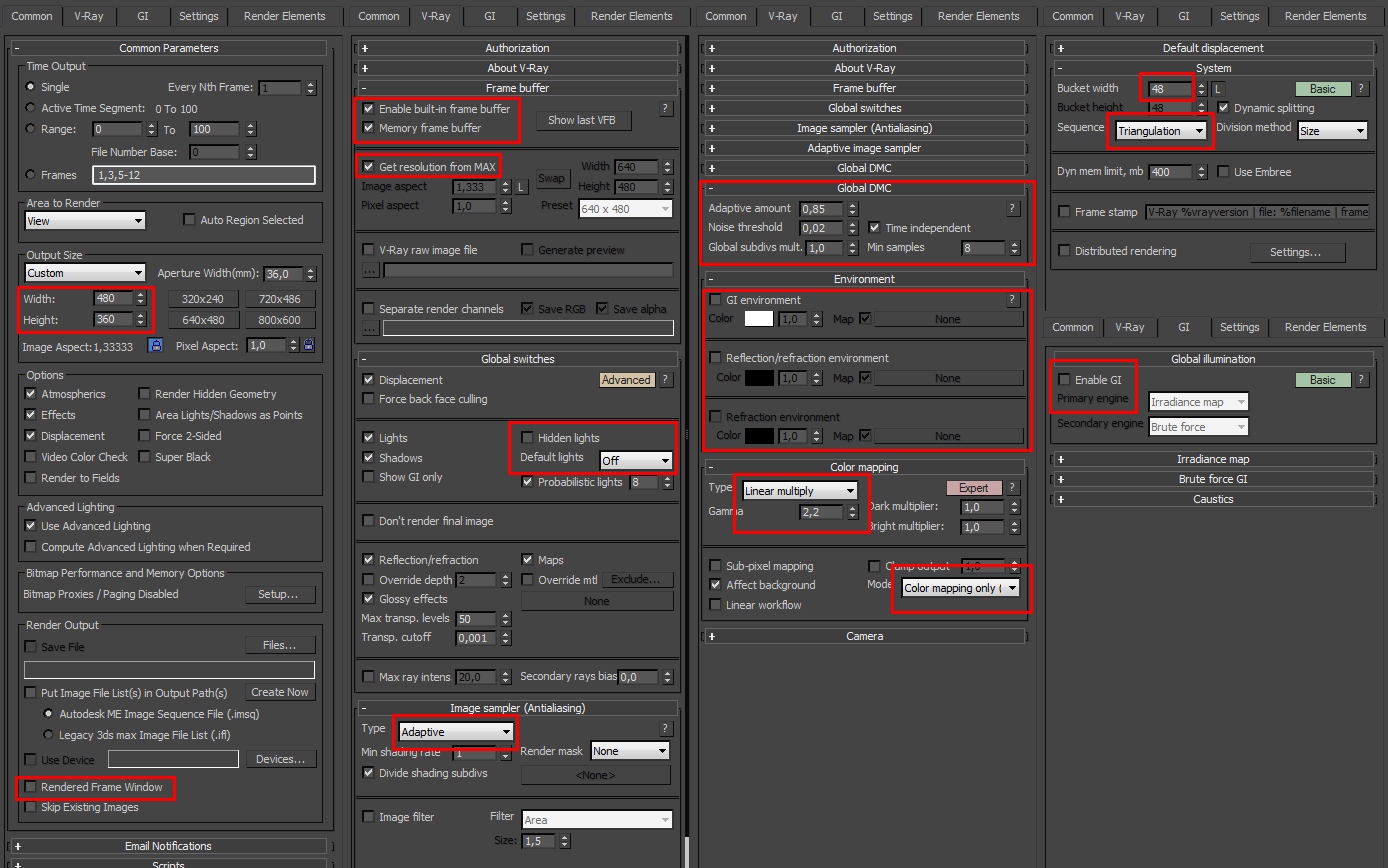
It is important that you start the tutorial with exactly the same settings. See below for a screenshot with all the startup settings.
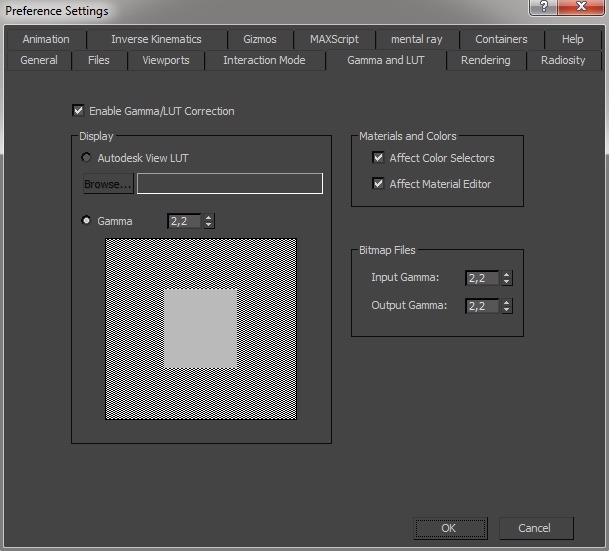
We also use the gamma 2.2 setup so change your max preferences like in this screenshot. In the latest max versions the settings should be identical. You can also set output gamma to 1.0, but then make sure you set the vray color mapping mode setting to 'color mapping and gamma' so the gamma is burned in the image.
|
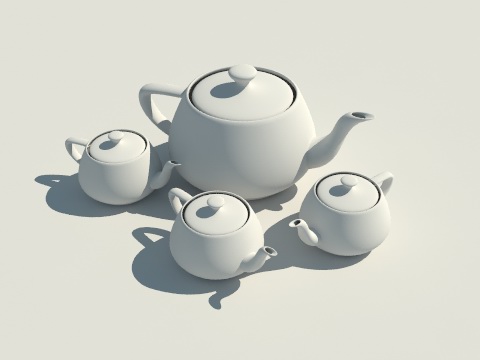
Create a simple scene
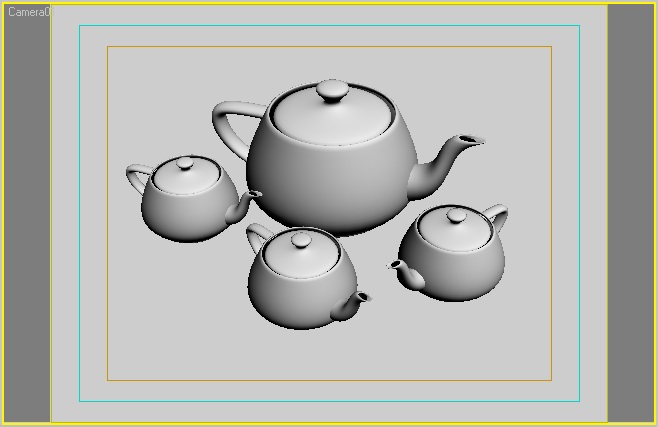
Simply create a large cylinder with some teapots on top. I also created a max camera with a lens of 50mm. Make a grey Vray material with a diffuse of RGB=220 and assign it to the cylinder (floor) and all teapots.
Note that I don't use RGB=255, so no pure white. In real life, no material is pure white, so don't do it in 3D viz either. Using very light materials will result in wrong looking GI lighting, since these materials will bounce off too much light.
If you render now, it should be black because there are no lights in the scene and we turned off the default 3dsMax light in the vray global switches. |
Turn on the skylight
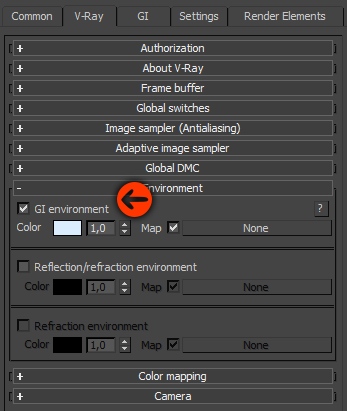
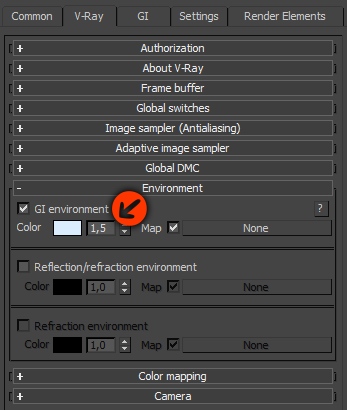
In the vray environment rollout, turn on the GI environment and give it a light blue color.
Render again, still black... The skylight is not a direct light source, it's not a real light that you can select in the viewports. Imagine it as an infinite big sphere surrounding your scene, casting light to the inside. This light is 'indirect' light, calculated by global illumination. So we need to enable GI for it to cast any light.
More info on GI can be found here.
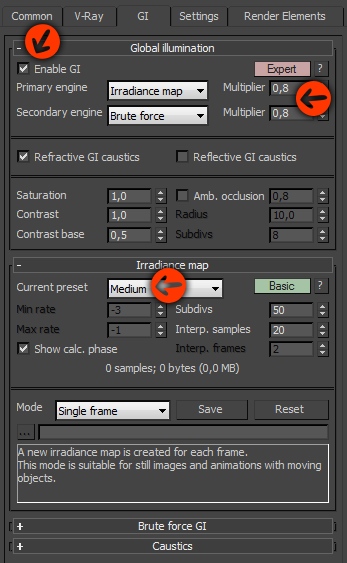
Open the Vray indirect illumination (GI) rollout and turn GI on. Adjust the settings like in the screenshot.
As you can see, we use a multiplier of 0.8 for both primary and secondary engine. This means that a maximum of 80% of the light hitting a surface will be able to bounce off (if the surface is pure white). If you never use too bright materials (see previous step) and use these GI multiplier setting, you will never get problems with your GI calculations. Using pure white materials and full GI multipliers can confuse V-ray, so this is a simple trick but it does make a difference!
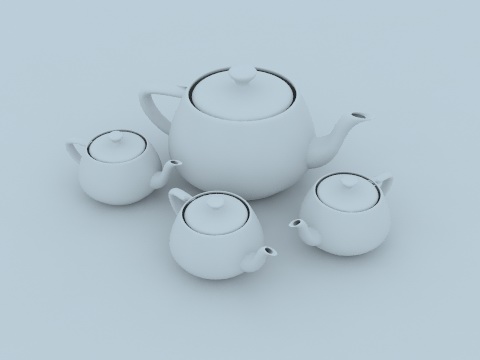
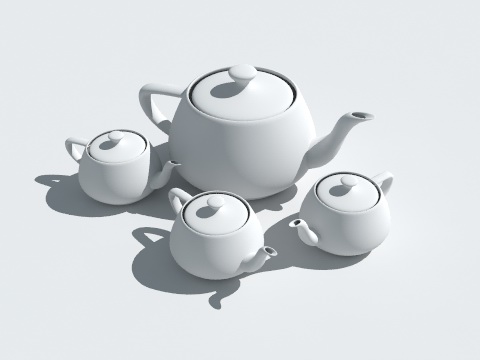
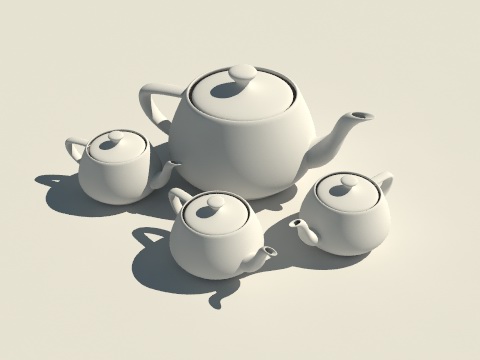
Now if we render again, you will see the teapots. The skylight is an environment light, which means it casts light uniformly from all directions. This results in very soft shadowing and uniform lighting on all surfaces.
|
Adjusting the skylight
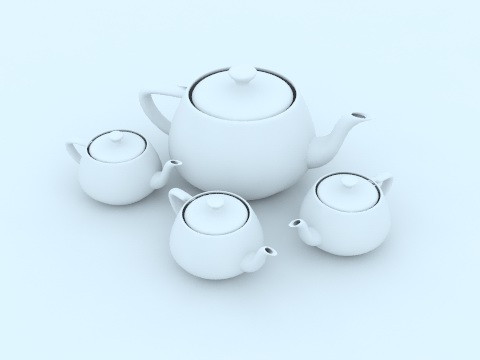
In the environment rollout, change the multiplier next to the skylight color to 1.5 and render again. The scene brightens up, because the multiplier is used a the skylights 'strength' value.
Also try some different skylight colors to see the effect on the rendering.
|
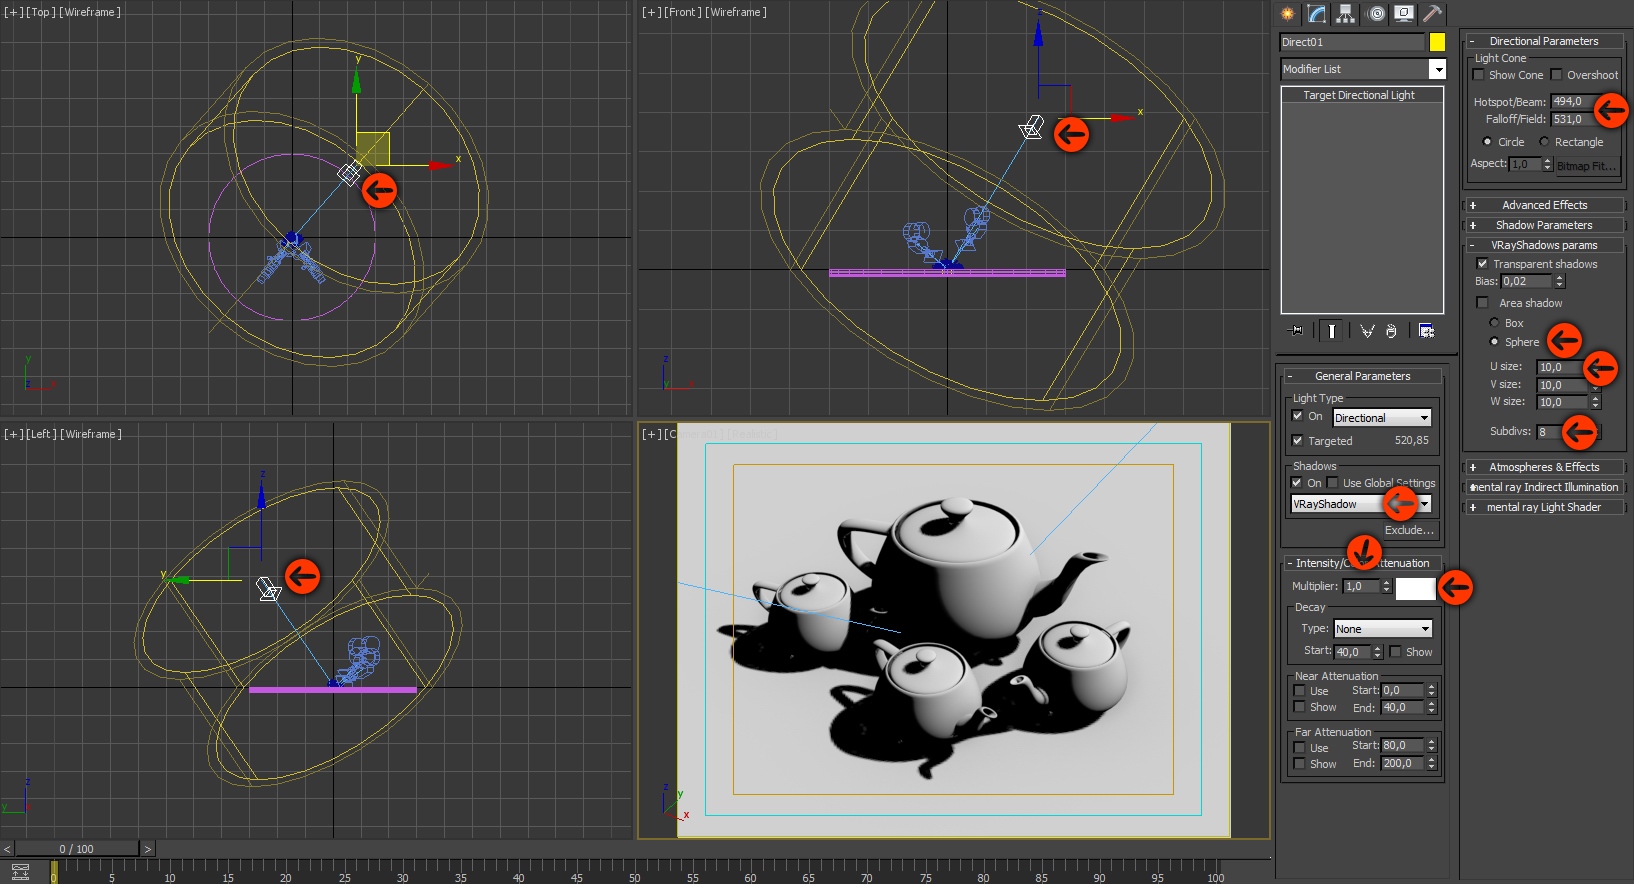
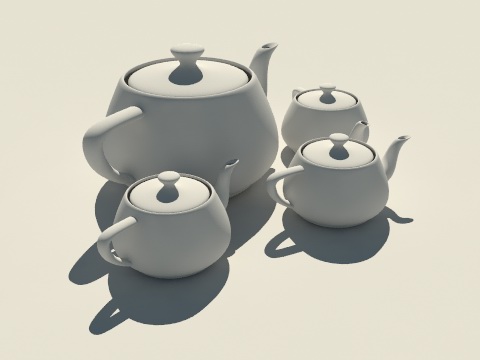
Add a 'sun'
To make the lighting a bit more interesting, we will add a direct light to the scene. I used a directional light with vrayshadows turned on. Make sure the light is bigger than your scene (check screenshot to see the light settings and placement I used).
When you render, the scene is way to bright because now we have a skylight of 1.5 and a directional light of 1.0. Together these 2 lights overexpose the scene...
Change the skylight multiplier to 0.3 and render again. Better already!
|
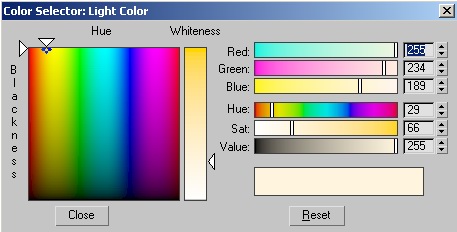
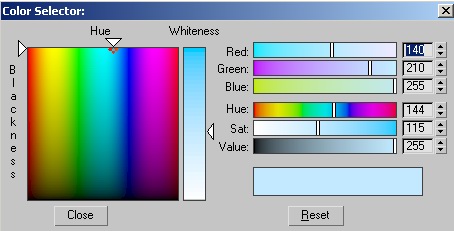
Lighting color
Change the directional light color to something yellowish, and the skylight to a bit more saturated blue. This will add a subtle change to the coloring of the direct and indirect lighting.
Try some combinations of more and less saturated colors for 'sun' and sky to find a satisfying result.
|
Balance sun vs sky
The sun would cast much darker shadows in real life. To achieve this, you have to adjust the balance between skylight multiplier and directional light multiplier.
For the next image an even lower skylight multiplier of 0.15 is used, and 1.15 for the directional light. As you can see this changes the overall contrast.
By changing the colors of both lights, and their strength, you can achieve different looks.
|
Conclusion
With a few simple clicks, you can create an good looking lighting setup. It renders fast, can be tweaked in every aspect and you can render any view without having to rotate your lights. Even when viewed from the back, the image still looks good as the skylight brightens up the parts of the model not directly lit by the main direct light source.
|
| Back to Vray tutorials page |
|
 |
|