Free Vray Tutorial - Create basic Vray materials |
| |
Please don't translate or copy these tutorials elsewhere. I don't like the tutorials to float around in 10 different versions and places on the net. Feel free to link to this page of course! (see also Terms of Use) |
|
Before you start
This tutorial was created with Vray version 3.0, please do not email me with questions about this tutorial if you are using a Vray version prior to V-ray 3.0, since the answer to your question is most likely that you're using a older version.
First learn 3D Studio Max, then start with Vray. It is an extension to 3DS Max, not a replacement! For example things like the material editor, creating and manipulating objects, modifiers etc should all be familiar before trying to learn Vray. |
|
 |
|
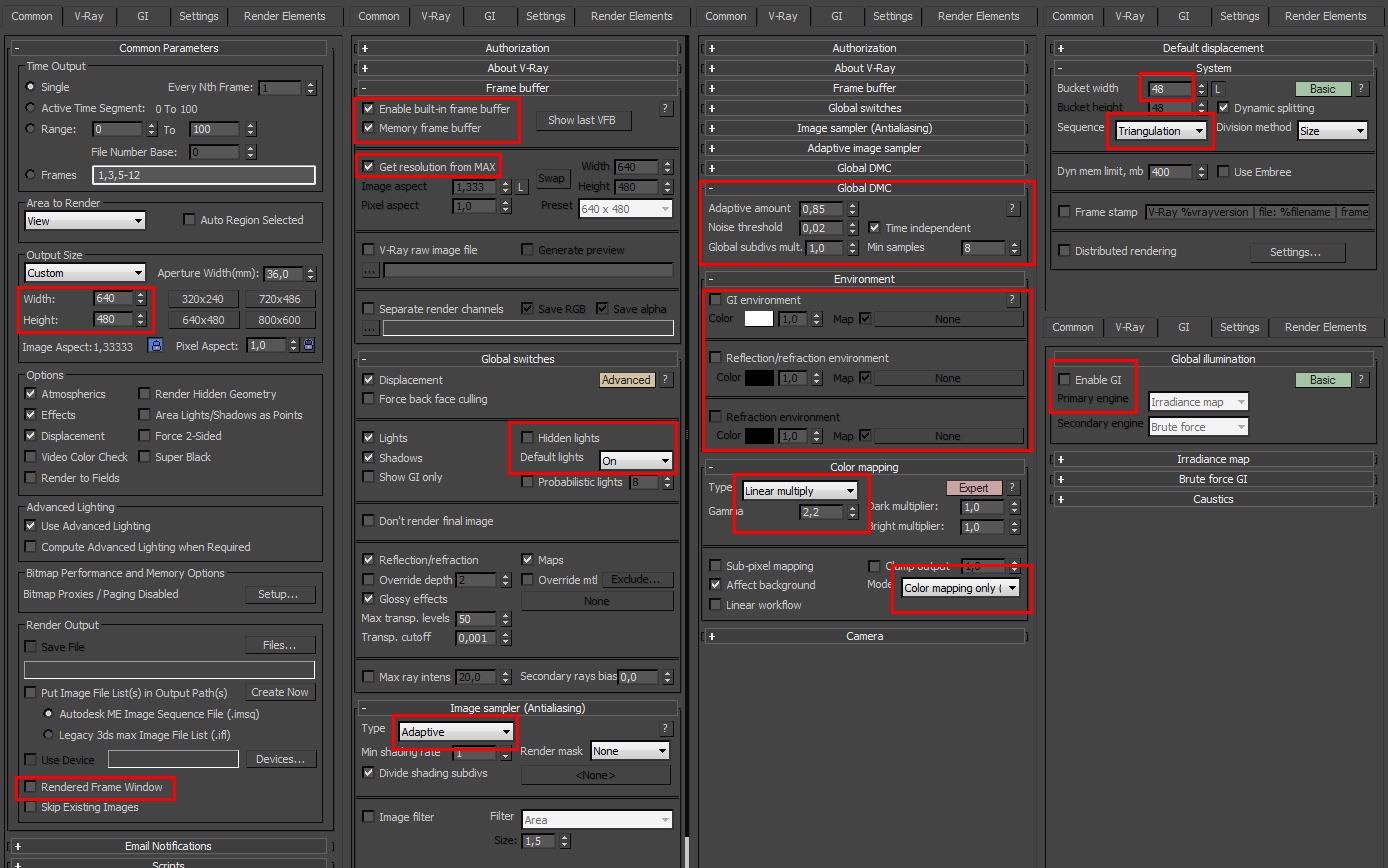
Startup settings
It is important that you start the tutorial with exactly the same settings. These settings also use the Vray frame buffer, the adaptive image sampler, no GI etc...
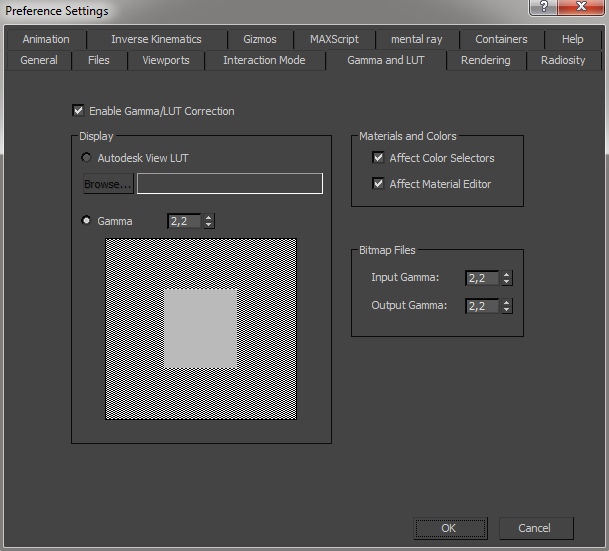
We also use the gamma 2.2 setup so change your max preferences like in this screenshot. In the latest max versions the settings should be identical. You can also set output gamma to 1.0, but then make sure you set the vray color mapping mode setting to 'color mapping and gamma' so the gamma is burned in the image.
|
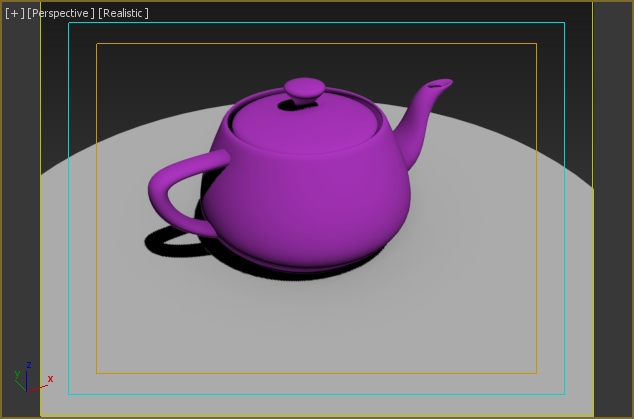
Create a simple scene
Simply create a cylinder with a teapot on top.
|
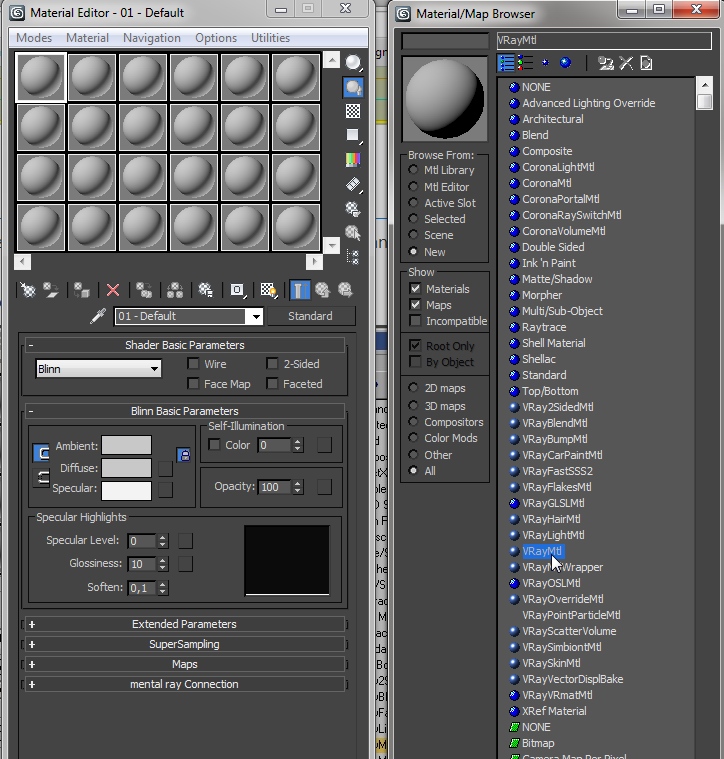
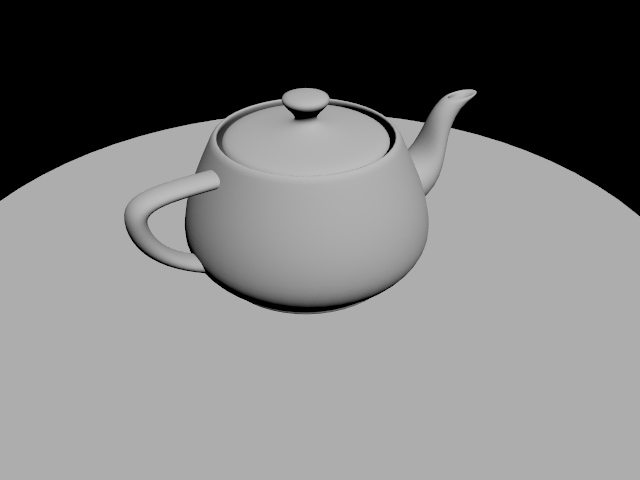
Load a vray material
Open the material editor, and in the first slot load a Vraymtl. Assign it to the cylinder and the teapot, you'll see the color change in the viewport.
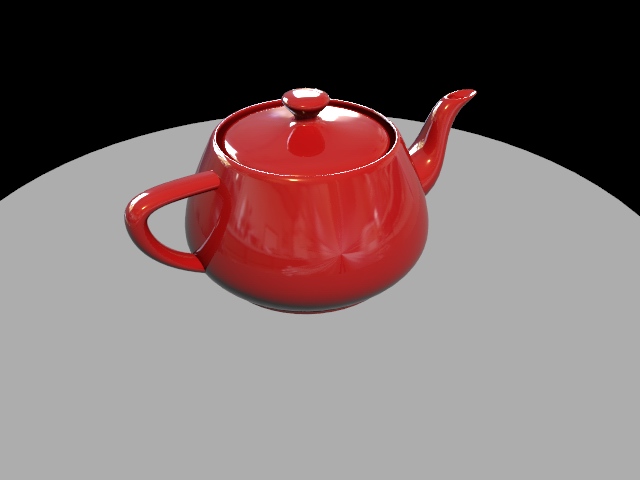
Hit render, a nice grey cylinder & teapot appear!
|
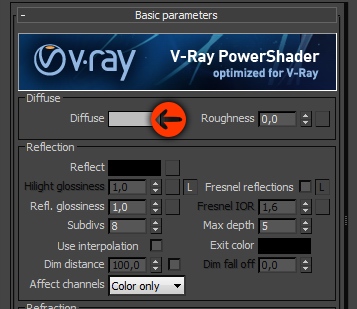
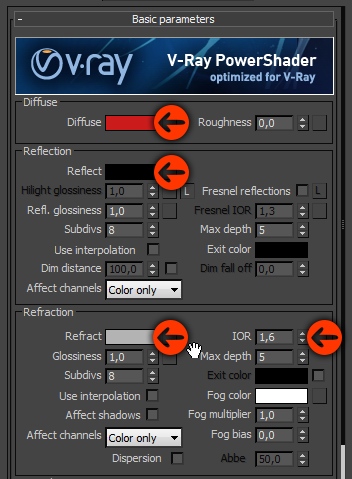
Diffuse color
In the material editor you can see all the basic Vray material properties.
The first one is also the easiest: diffuse color. This is simply the base color of your material.
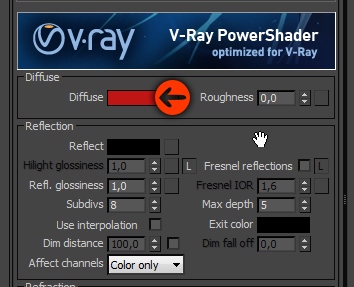
Duplicate the grey material and rename it 'teapot'.
To change the diffuse color, click on the color swatch next to it and choose a color, for example a deep red. Assign the teapot material to the teapot in the scene.
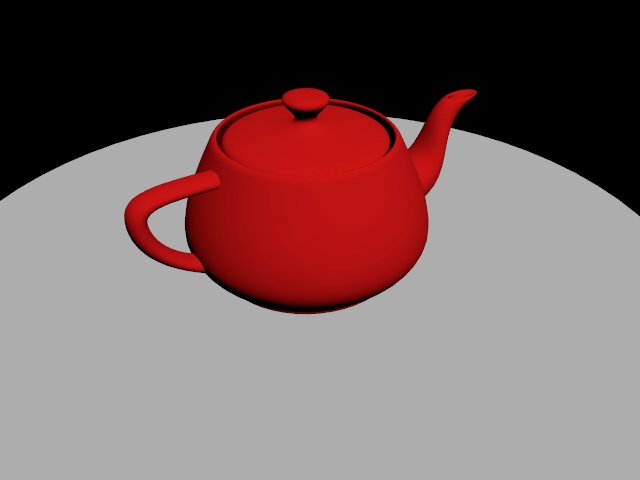
If you render, the teapot should now be red.
|
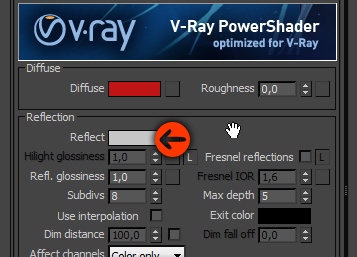
Reflection color
The next parameter is the reflection color. In some 3D programs there is a slider for reflection strength, well this is the same but it uses color values to set the reflection strength.
Black means zero reflection, white means 100% reflection (mirror). If you choose white for reflection, the diffuse color will completely disappear, since the material is now 100% reflective.
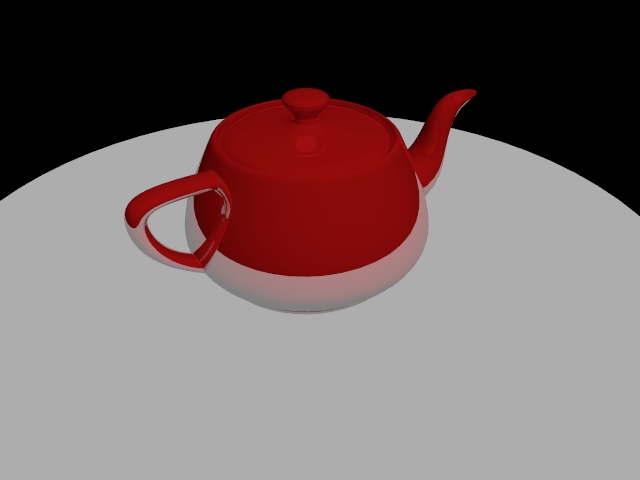
For now, choose a medium grey and hit render. You'll see that the teapot becomes reflective: it is reflecting the black environment and the grey cylinder (and itself of course - note the teapot's handle is reflecting in its body).
|
|
Reflections and environment
As you can see, the reflections look a bit dull. If you want nice reflections, you need something in your scene to reflect in the object. Instead of building a complete environment, there is a much easier way: hdri environment maps.
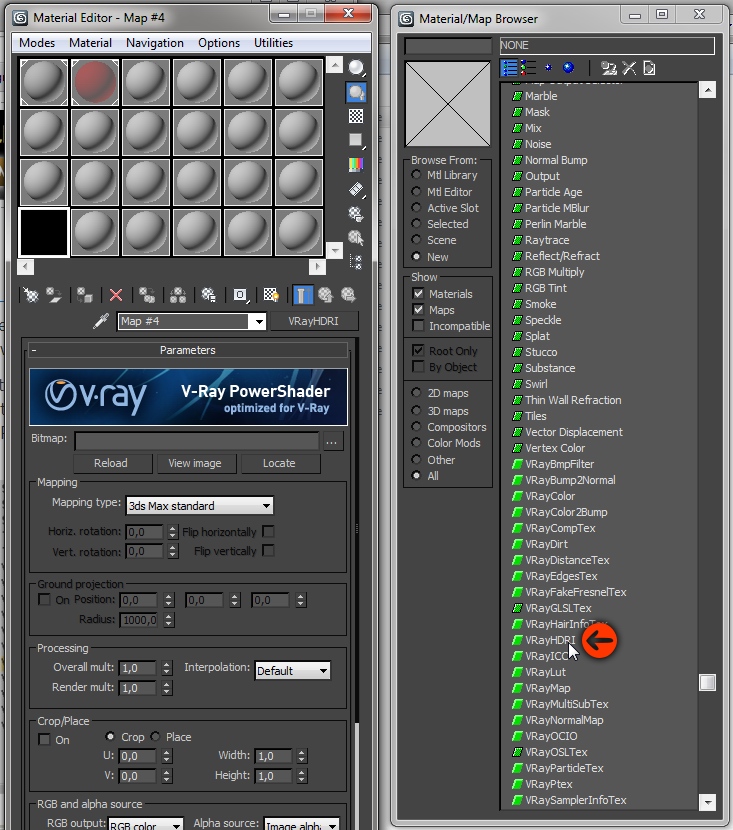
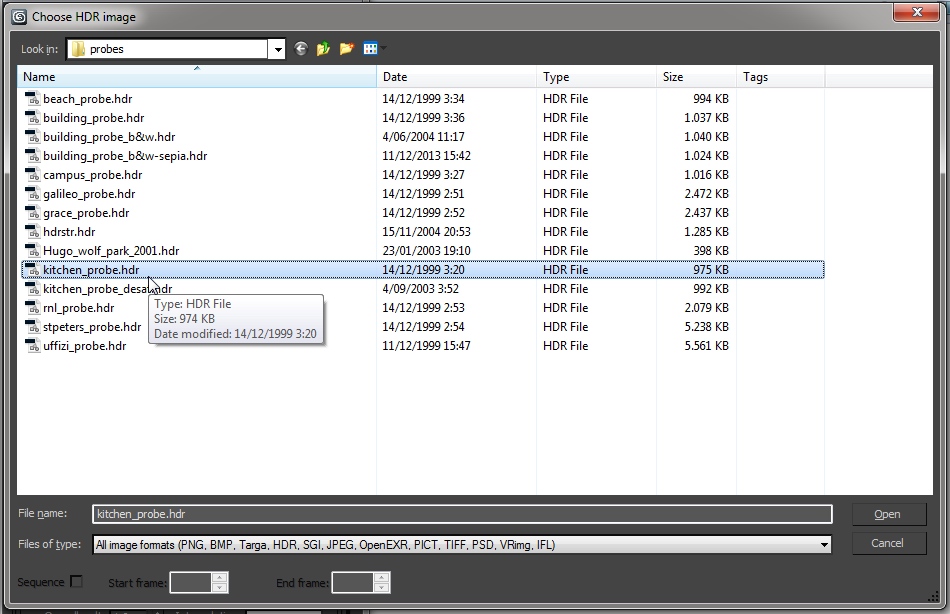
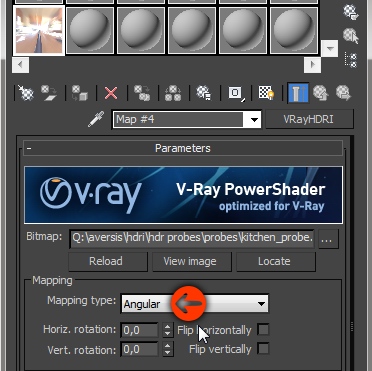
Go to an empty slot in the material editor and click the 'get material button'. In the material/map browser, scroll down and double click on the VrayHDRI map. Now in the HDRI map settings, click the browse button and choose any hdri map. There are a lot of free ones online, here the famous kitchen hdri map is used.
You can also find a lot of high quality maps here!
Or free hdri maps here!
This map is in the 'probe' format and you'll have to select 'angular as the mapping type in the VrayHDRI settings (see screenshot). Leave everything else default.
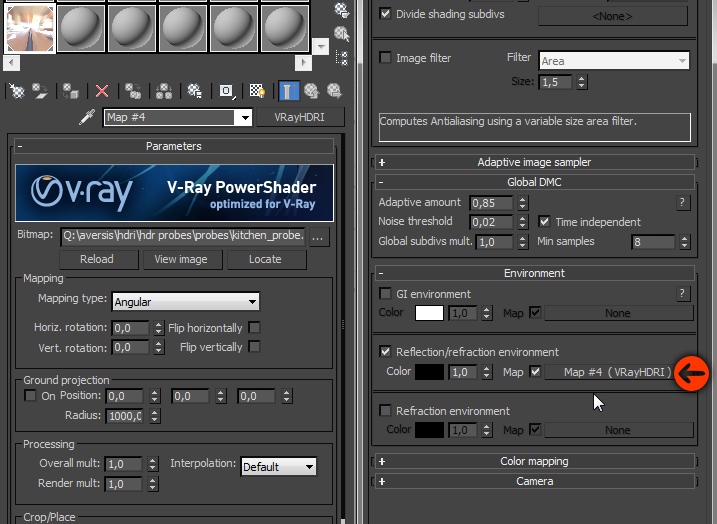
Now we have to assign the map to the environment of the scene. We will not use the Max environment, because Vray has its own environment options. Use the max environment only if you want your map to also show up in the background of your rendering.
Go to the Vray environment rollout, turn on 'reflection/refraction environment override' and drag the hdri map from the material editor onto the map slot.
|
Reflection and Fresnel
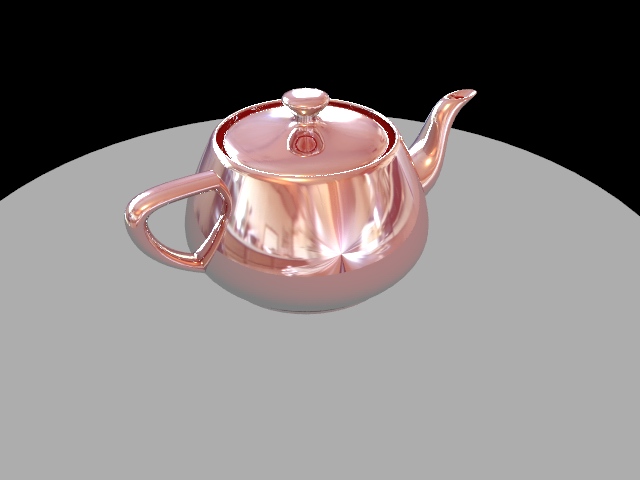
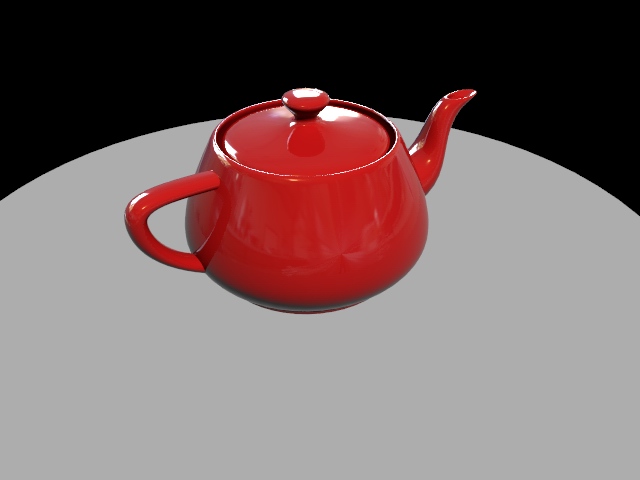
So we loaded a hdri map in the vray reflection environment slot. Hit render and look at the result. The reflections look very strong! Actually the material didn't become more reflective, it just got a complete environment to reflect in so the reflections are simply more prominent now!
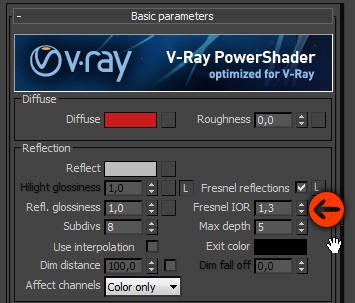
The material has a medium grey reflection color, which means about 50% reflection strength, this is actually a lot.
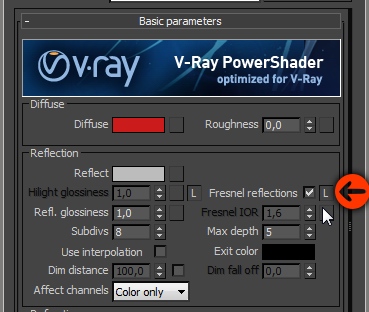
Next to the reflection color is a small checkbox: "Fresnel reflections". This is a very important feature that almost all materials have. Check it and render again: the reflections look a lot less strong now.
Here's a tutorial for more info about fresnel and other material properties.
The Fresnel option depends on the Index Of Refraction of the material. IOR is a property in the refraction options, but as you can see in the reflection options, there is a property called Fresnel IOR which is dimmed. Next to the Fresnel checkbox, there is a small 'L' which is a Link button. When it is pressed, the Fresnel IOR is linked to the Refraction IOR. This is the default behavior and also physically correct. When you unpress it, you can change the fresnel IOR independently from the refraction IOR.
For now, unpress it and change the Fresnel IOR to 1.3.
Render again, and notice the reflections now: in the center of the object the reflections are less strong, while the sides of the object still reflect a lot.
When you enter 1.0, all reflections will be gone... When you enter for example 16, you will get an almost mirror like surface.
It is a good habit to always use fresnel on any reflective material, and simply change the reflection color and fresnel IOR to your needs.
Experiment yourself with reflection color, fresnel IOR and diffuse color to see the effects on the material. |
Refraction color
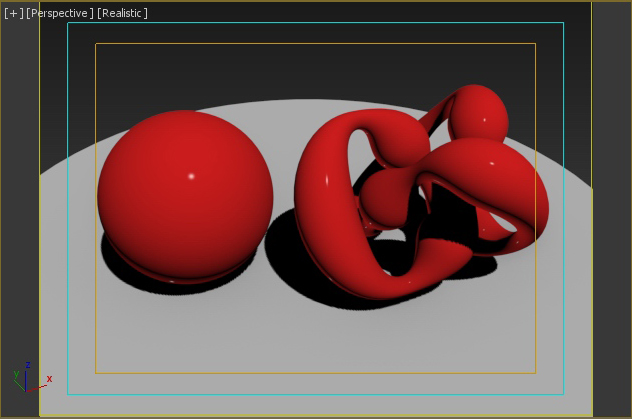
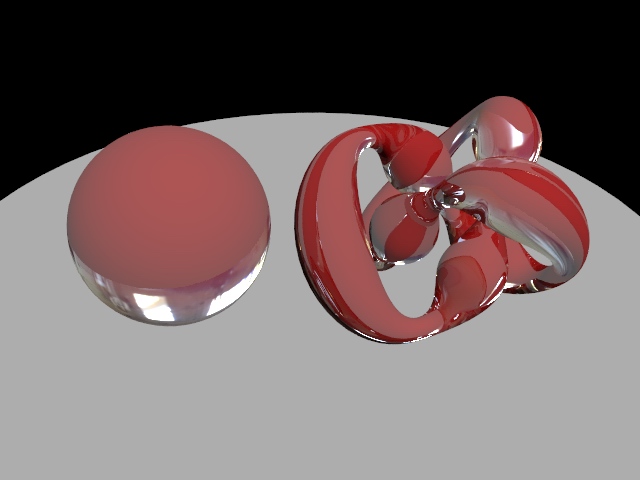
First delete the teapot and create some other objects, for example a sphere and a torus knot with some lumps in it.
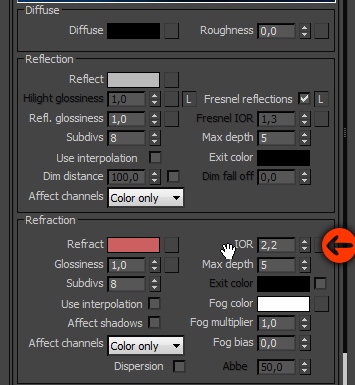
Adjust the material like in the screenshot: a red diffuse and a middle grey refraction color. All the reflection parameters are back to default, so no reflections.
Render the image and you'll see that the objects are semi transparent. The red diffuse color is still partially visible.
|
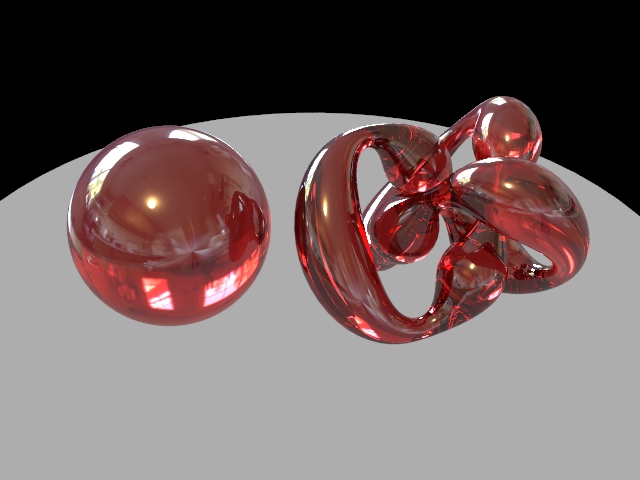
Refraction
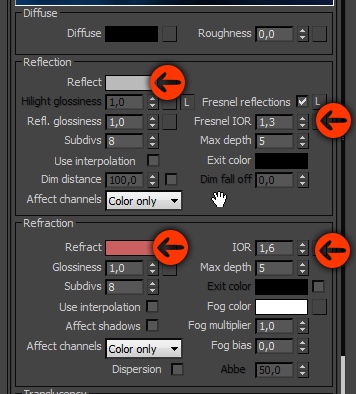
A better way to color the refractions is by using a tinted refraction color and a black diffuse. Black diffuse means that you turn off the diffuse component, and the color of the material will be determined by the refraction color only.
As you can see, the refractions are all tinted red now (look at the bottom of the sphere compared to the previous image).
|
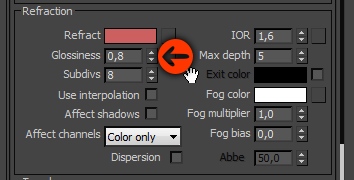
Refraction glossiness
There is also a glossiness parameter for refraction. This will blur the refractions.
Play around with refraction color (darker, lighter, more saturated,...) and the glossiness parameter to test different effects.
The subdivs control the quality of the blurry refractions. Note that blurry refractions are quite slow to render.
There are many other refraction parameters, but for now this is enough. With basic diffuse, reflect and refract settings you can create already a lot of materials.
|
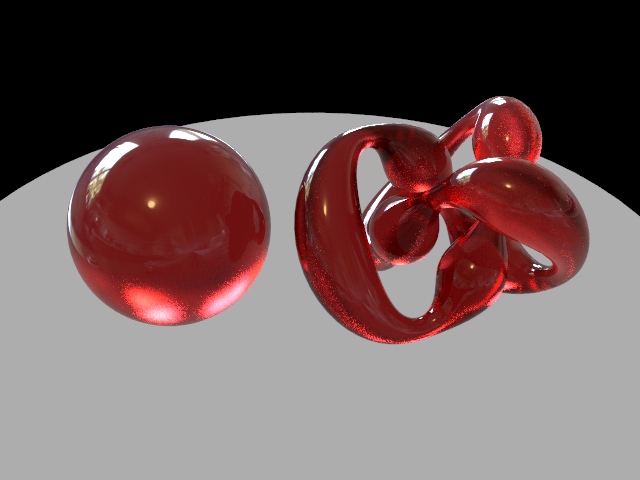
Refraction IOR
The IOR is Index of Refraction. It is a material property that changes the way light travels trough transparent objects. Light hits a surface and will bend off under a certain angle. It travels trough the object and when leaving it, it will bend again. The IOR makes for example objects under water appear closer or in another position than they actually are.
The first image is with the refraction IOR lowered to 1.1, and the fresnel IOR linked to the refraction IOR again. As you can see, the objects refracts the light less so you can almost see right trough it without much distortion. Because we linked both IOR's, reflections are also not very strong anymore.
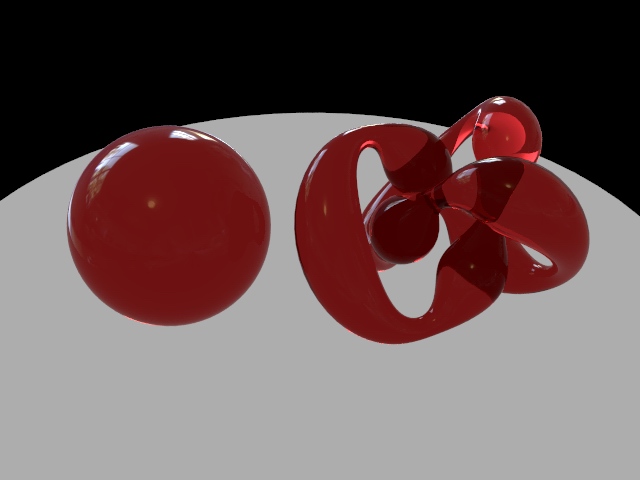
Change the refraction IOR to 2.2. Now there is a lot more refraction going on!
We linked both IOR's, so reflections are also a lot stronger than before.
|
Conclusion
That's it for this very basic Vray material tutorial.
With these parameters:
- diffuse
- reflection color
- fresnel
- refraction color + glossiness
- refraction IOR
You can already create many of some commonly used materials:
- Plastics
- Glass
- Transparent plastics
- Metals: alloy, copper, chrome, steel, ...
|
| Back to Vray tutorials page |
|
 |
|