Gamma 2.2 setup or linear workflow - [2] |
| |
Please don't translate or copy these tutorials elsewhere. I don't like the tutorials to float around in 10 different versions and places on the net. Feel free to link to this page of course! (see also Terms of Use) |
|
|
| Page 1 - Page 2 - Page 3 |
| |
Before you start
If you discovered this Vray tutorial page through a direct link or search engine, please note that you're on page 2 of the tutorial! Please complete page 1 first if you haven't done so. |
How does it work??
By now I hope you realize the benefits of gamma correcting your images.
The first step to do is to change some max preferences.
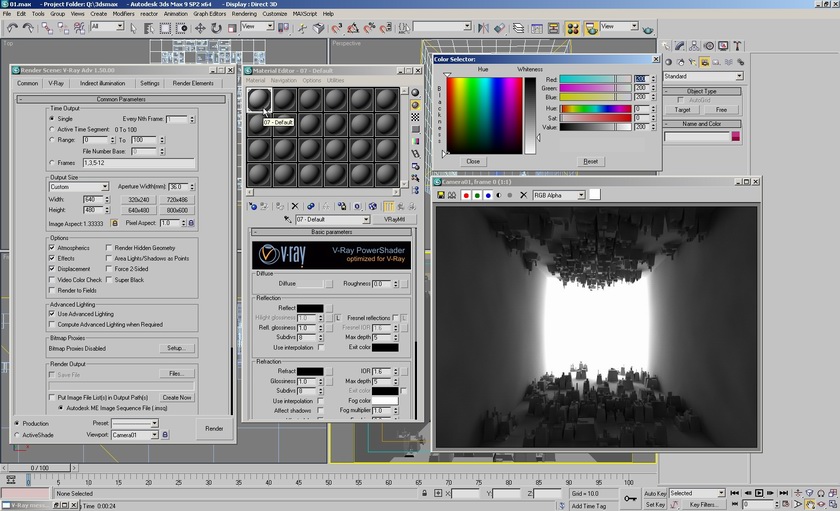
The first image below is a screenshot of how the max interface looks like without any correction.
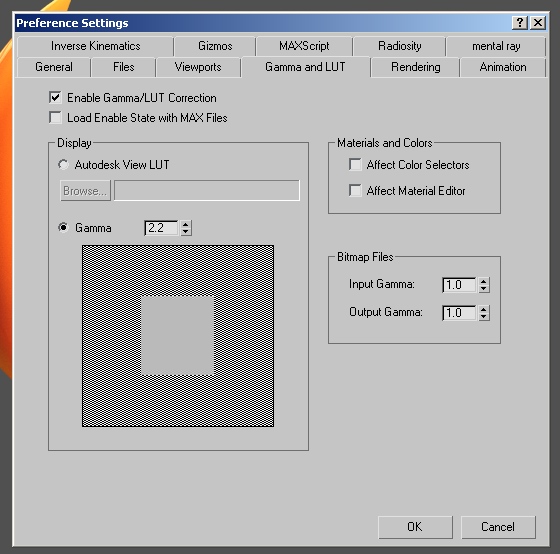
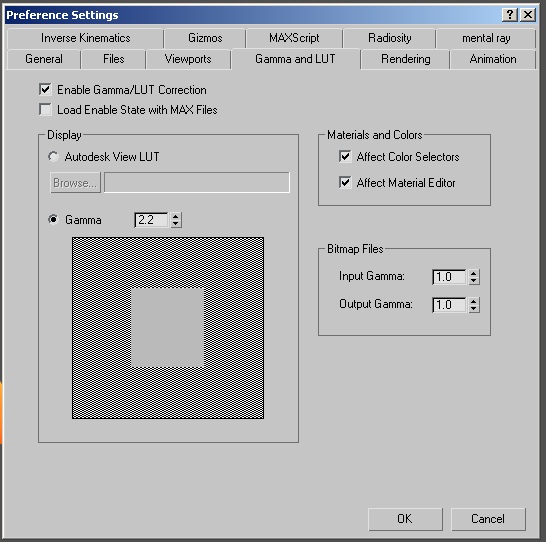
Now go to "customize/preferences" and open the "Gamma & LUT" tab. Change the settings as shown in the screenshot. So basically you enable the gamma correction on the max interface: fill in gamma 2.2.
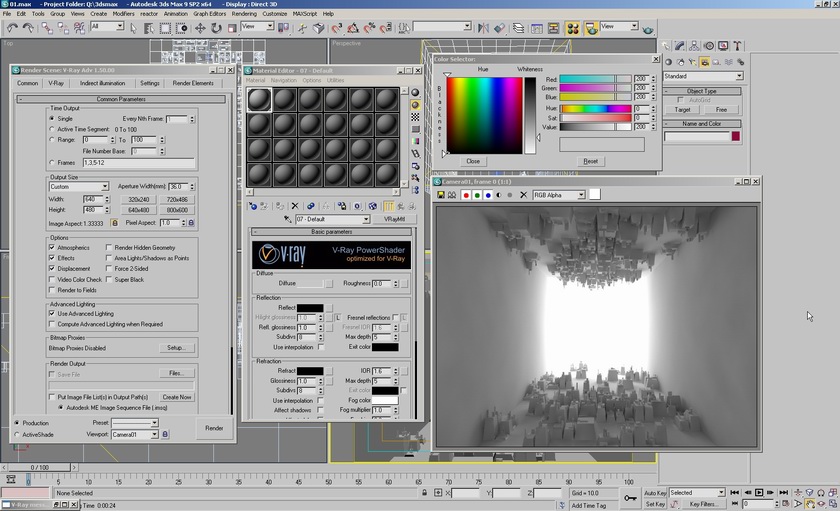
If you press ok, the rendered image will look very different! You have changed the way max displays the rendering in the frame buffer.
Now it is displayed with a gamma 2.2 curve.
|
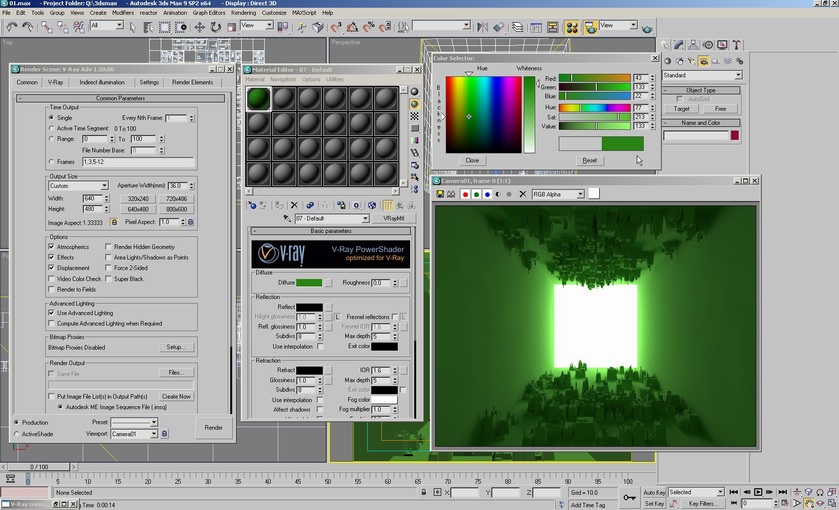
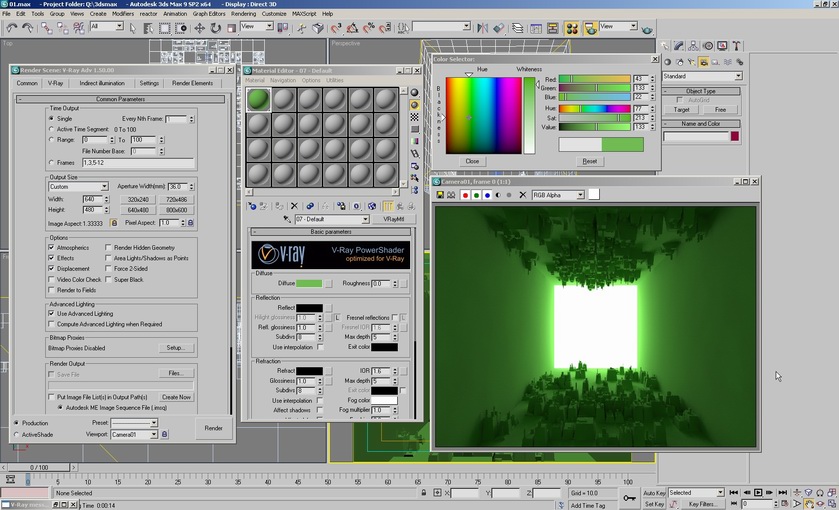
First 'problem' - choosing colors
I make the color of the walls a dark saturated green. Render the image: it doesn't look so dark and saturated anymore... This is because we are actually choosing colors in 1.0 space, and we are rendering in gamma 2.2 space...
The solution is easy, in the gamma & LUT preferences, just select both the "affect color selectors and material editor" options. When you press ok, you will see the interface changing drastically!
Look at the last image from this step. Both material editor and color selectors are now gamma 2.2 corrected. This might look very strange at first, but you'll get used to it. For me, when I revert back to the original look, it all seems extremely dark... So it's just a habit!
This is an important step however, because otherwise you will be choosing colors and they will always look brighter and more washed out in your renderings! You can see how the green has changed in the color selector. This is closer to the green in the rendering than it was in the previous step (light and unsaturated) |
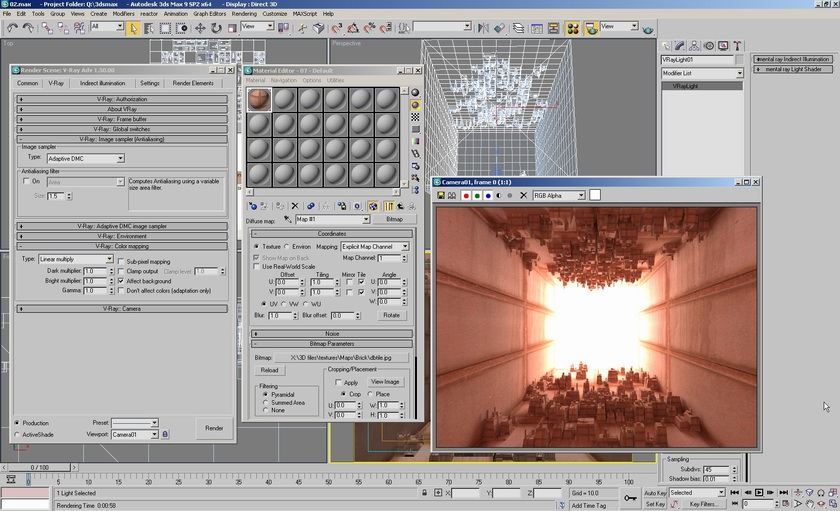
Second problem - washed out textures
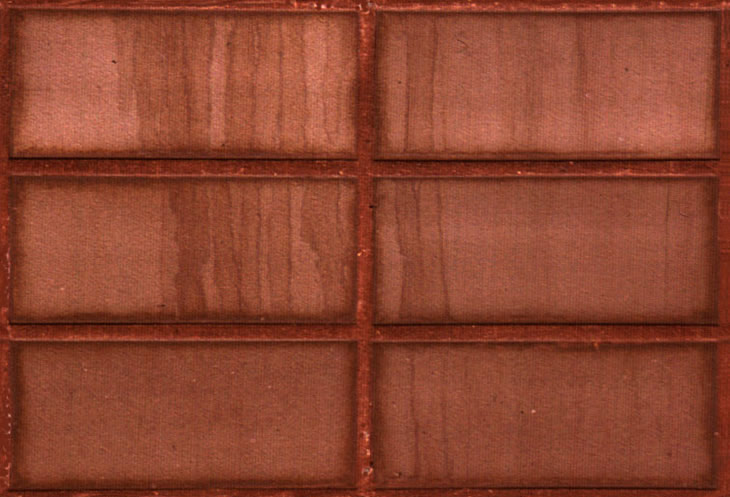
Instead of a green color, I now add a texture map to the diffuse slot. I used this brick texture, which is very saturated. But in the rendering, it's again desaturated and washed out (compared to the original texture).
All your normal textures are in fact already gamma corrected. For example pictures from a digital camera usually have an srgb profile in them, to make sure they are displayed correctly on your gamma 2.2 monitor. So when you use this texture in max, without telling it is already gamma corrected, max will think it is a gamma 1.0 texture and it applies gamma 2.2 correction to it. But the texture already is gamma 2.2 corrected! Applying gamma correction twice results in much brighter and desaturated colors...
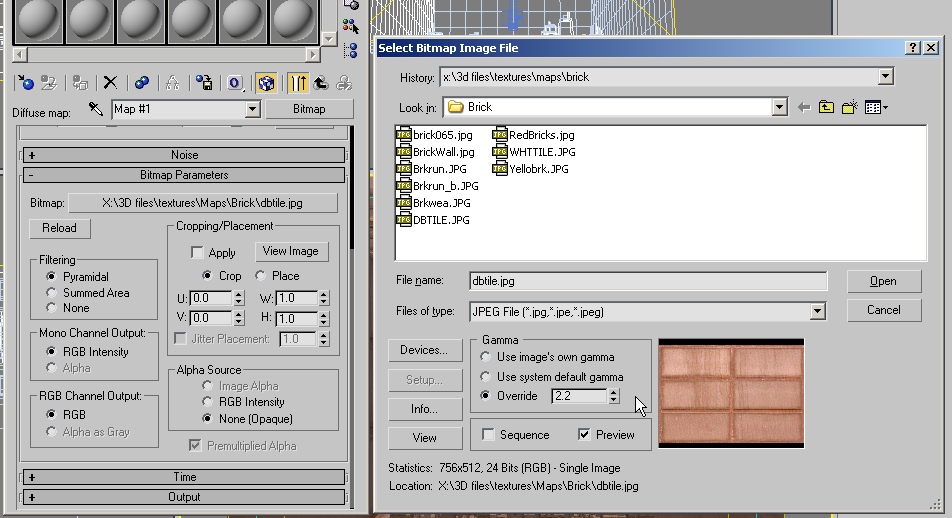
So we need to tell max this texture is already gamma 2.2 corrected. In the map's properties, click on the path button. Don't choose another texture, simply change the radio button from 'use system default gamma' to 'override' and fill in '2.2'. Click open and notice how the textured material editor preview is already darker now, and also the texture in the viewport. This looks more like the original texture!
Render again, and the result is indeed more saturated like you would expect when using this texture.
Now you have two options for dealing with textures:
- each time when you load a texture, specify its gamma in the bitmap loader
- in the gamma & lut preferences, set input gamma to 2.2, so all your textures will be loaded into Max as gamma 2.2 textures.
|
Third problem - saving the image
So far so good. I have a nice render, so I save it. Now I open it in an image viewer and suddenly it looks like crap: very dark and over saturated.
The answer is again pretty simple. In max, we changed to gamma 2.2, which means everything is 'displayed' with a 2.2 correction. The actual rendering doesn't have this correction 'baked in' however, it is only previewed with gamma 2.2 in the max frame buffer.
Again we have several choices:
- when saving the render, specify it should have a gamma 2.2 curve baked in
- adjust the gamma in photoshop
- leave it at 1.0, and adjust photoshop to work in linear space (1.0)
Advanced users who need to do very accurate post corrections and compositing, prefer to leave the image as is (1.0), and always use preview preferences to gamma correct the image. So they leave the image with gamma 1.0, or 'linear'. If you work with your images in this way, you are working in 'linear space'. However this isn't that easy, since you have to set up your other applications to work in linear space also to preview your image correctly.
Since most of the people don't need this, it is easier to 'burn in' the gamma 2.2 correction. For example saving from max with the gamma 2.2 option or changing the gamma in photoshop both burns in the gamma 2.2 curve into the image.
|
|
| Page 1 - Page 2 - Page 3 |
| Back to Vray tutorials page |
|